- Home
- Microscope Measurement and Inspection Solutions for Electric Vehicle Development and Manufacturing
- Microscope Solutions for Gear and Bearing Manufacturing
Roughness Measurement of Gear Teeth for Eco-Friendly Cars
While eco-friendly cars are much quieter than gasoline-powered cars when driving, some components in an eco-friendly car can increase the driving noise level. For instance, gears can increase the driving noise level if the surface of the teeth are not smooth enough.
For this reason, the gear teeth used in eco-friendly cars are likely to be subjected to stringent surface roughness requirements. The tools used to validate the surface roughness of gear teeth must be capable of high accuracy to meet these demands. Noncontact measurement is also important, as contact-type measurement devices (e.g., stylus-based systems) risk damaging the gear’s surface.
Our Solution
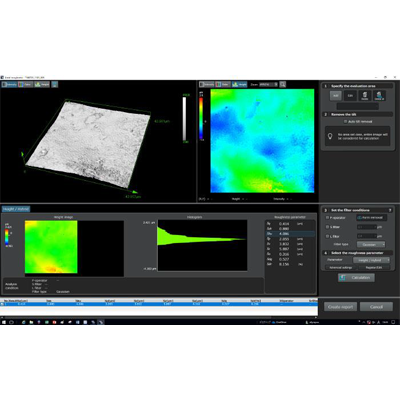
Our LEXT™ OLS5100 3D laser scanning microscope offers high-precision and noncontact measurement of gear teeth surface roughness:
- Measure minute gear teeth roughness that is difficult to measure with stylus-based contact instruments; surface is scanned with a 0.4 µm diameter laser light to acquire highly precise data
- Obtain data simultaneously for a more extensive analysis of gear teeth roughness than with a stylus-based contact instrument
- Horizontally stitch various kinds of data to quickly measure a wider field of view with high accuracy
 OLS series laser scanning microscope |  Gear teeth surface roughness measurement example (using a replica; 100X objective lens; 3x optical zoom) |
Application Notes
Explore related applications:
 |
|
Roughness Measurement of Inner and Outer Rings of a Ball Bearing
Bearing balls roll at high speed through the raceway formed by grooves in the inner and outer rings of a ball bearing assembly. In quality control, it is important to accurately evaluate the roughness of both the balls and the grooves.
If a conventional microscope is used to evaluate roughness, the working distance of the objective lenses may be too short to all ow clear focusing on the bottom of the grooves, which can prevent accurate measurement.
Our Solution
Our LEXT OLS5100 laser scanning microscope enables focused, 3D measurement of roughness on raceway grooves over long working distances. The system is equipped with long working distance objectives for roughness measurement on grooves up to 6.5 mm (0.26 in.)
 OLS series laser scanning microscope |  An example of roughness measurement on the groove of an inner ring (long working distance 100X objective lens; 4x optical zoom) |
Application Notes
Explore related applications:
 |
|
Analysis of Cleaned Bearings for Metal Contamination
Bearings are important components of mechanical drive units. They enable a machine's rotating parts to move smoothly by reducing friction. To maximize the bearings' performance, they must be precisely machined. Any metal comtamination during the manufacturing process can impede the bearings' ability to rotate with minimal friction, potentially causing them to fail and damaging the drive unit. Even contamination by metal pieces a few μm in size can cause the bearing to fail.
To help prevent contamination, bearings are cleaned during each step of the manufacturing process and then tested for contamination as part of post manufacturing quality control. Also, to properly assess the level of contamination, inspectors need a system that can accurately count the num ber of contaminant particles and measure their size and shape.
Our Solution
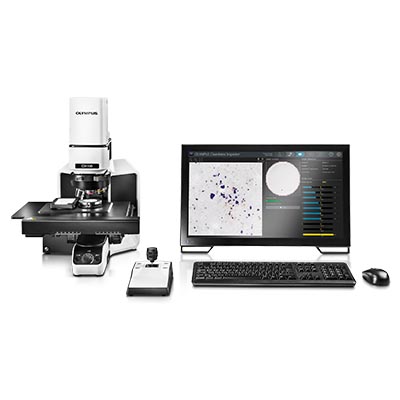
Our OLYMPUS CIX100 cleanliness inspector offers integrated hardware and software designed for contamination analysis. Each component of the system is optimized so operators of all experience levels can obtain reliable and reproducible results.
 OLYMPUS CIX100 cleanliness inspector |  Contamination data is classified by size after each particle is detected |
Application Notes
Explore related applications:
 |
|

