搅拌摩擦焊缝检测
概述
Friction Stir Weld Inspection
Friction-stir welding (FSW) is a process mostly used on aluminum parts for high grade applications, notably in the Aerospace and Defense industry. Instead of using added material as is done for conventional welding methods, a tack tool is used to heat and mix the two pieces of metal in the jointed area.
FSW has multiple advantages over traditional welding methods; FSW avoids the defect types that tend to arise with liquid phase cooling in other welding methods. Additional defect types occur mostly as a result of insufficient temperatures or welding conditions; these defects must be correctly identified and sized.
Natural DefectsDifferent types of defects can occur in friction-stirred welds, such as incomplete continuity of the bond between the material from each side of the weld (referred to as “kissing-bond”), long tunnel-like defects, and lack-of-penetration. Also, due to the friction-stir welding process, defects can be randomly oriented inside the weld. |
Schematic view of FSW manufacturing process. |
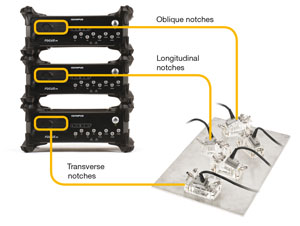
Calibration DefectsLongitudinal, transverse, and oblique notches located on the OD and ID are used as references for the calibration process. Side-drilled holes are also employed to build the time-corrected gain (TCG) curve, which will account for signal attenuation inside the material. |
Random-oriented defects generated during the manufacturing process. |
Inspection Technique
Longitudinal and Oblique Defects Olympus’ 64-element probes used with normal water-coupled wedges positioned perpendicular to the weld line orientation ensure proper detection of longitudinal and oblique defects through the complete welded area. Skewed probes can be added to improve detection and sizing on oblique defects. | Transverse Defects 64-element probes used with lateral water-coupled wedges positioned parallel to the weld line orientation facilitate the detection of transverse defects. These probes ensure full coverage of the welded area. |
Normal-orientation phased array probes and wedges for longitudinal and oblique defect identification. |
Lateral-orientation phased array probes and wedges for longitudinal and oblique defect identification. |
解决方案
High Performance Solution
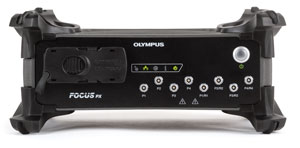
Powerful and Rugged InstrumentThe high-end FOCUS PX specifications enable FSW inspection to be performed at faster pace than ever before while maintaining unequaled signal quality. The high data throughput capability enables uncompressed A-scan to be retrieved without compromising inspection speed. The rugged, fanless FOCUS PX design allows it to be used in harsh production environments. It is IP65 rated and its casing has multiple fins for optimized heat dissipation.
|
| |||
Scalable ArchitectureThe scalable architecture of the FOCUS PX allows up to four units to be used in parallel. This enables advanced multiprobe configurations to be driven from a single inspection station for complete weld coverage in a single inspection. When working with multiple units, all I/O signals are received by one unit, which greatly simplifies the integration. The other units are synchronized with each other through a simple cable.
|
| |||
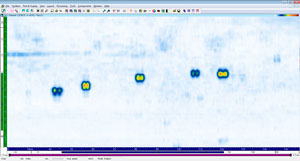
Efficiency-Driven SoftwareThe FocusPC software contains advanced features that can be used to optimize the FSW inspection process. Its customizable displays enable operators to efficiently identify and size defects while its powerful data processing features allow data to be conveniently manipulated through the analysis process. |
C-scan display of FSW data in FocusPC. |


