Summary
Many codes allow for the substitute of one method of stated nondestructive testing NDT for another as long as certain requirements are met. A popular trend in recent years is the complete replacement of radiographic testing with ultrasonic methods. Although this offers huge benefits in many cases it is not always practical in all cases because of time investment, training, procedures, end user approvals, investment in new equipment, personnel requirements, and other considerations. This is often done as a permanent complement that fits the environment or as short term cooperation between methods while the complete switch to Phased Array is being implemented.
Introduction
Even when a complete technique replacement may not be feasible there are many possible scenarios where radiography can be left as the final acceptance method and manual phased array ultrasound can still be applied to increase quality and efficiency of process. The smaller compact, less expensive and more user friendly phased array instruments now available make this an even more valid addition to a radiographic inspection process.
Areas Where Phased Array is Typically Employed in a Radiographic Process
- Buildup of thick welds in between passes
- Allows for verification that initial weld build up is defect free before adding more material without moving the component to an area for radiographic test or clearing the area. This is especially valuable when using costly base and filler materials, clads, and in very thick pressure vessel manufacturing.
- Verification of defect type and extent suspected from radiographic film
- Phased array views and image processing ability offer additional tools for defect characterization especially with difficult-to-interpret defects.
- Verification of geometric features and inspection of valves and other tie-ins where radiographic film placement is difficult and subject to errors.
- Verification of repairs made based on radiographic examination
- Phased array can easily be applied quickly to verify the repair was successful before taking final acceptance radiography after repair. This is very valuable for large components that are difficult to move around.
- Prove up and height sizing of defects found with radiography
- Allows instant depth and thru-wall extent without removing component from radiography area.
- Auditable data saving
- Manual Sector scans and other image types can be saved so A-scans can be replayed as a permanent volumetric record of discontinuity.
Why Manual Phased Array is a Great Complementary Method
- Accurate Depth and thru-wall extent sizing.
- Flexible programming angles for coverage and detection.
- Imaging including raw A-scan data.
- Portable and easy to employ in difficult-to-access areas and areas where there is little room to place film.
- No hazards or chemicals and can be employed without stopping other processes around it or moving parts.
- Upgradeable to encoded phased array to meet radiographic replacement codes.
- Same as ultrasonic physics so easy to re-train existing workers.
- Well established codes, guides and training paths.
Typical Equipment and Inspection Requirements
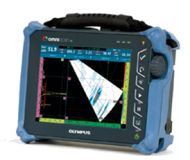
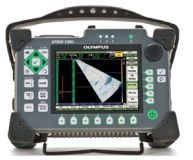
- Phased Array Acquisition unit (OmniScan SX or EPOCH 1000i)
- Phased Array Probe and Wedge chosen by materials that need to be inspected
- Ultrasonic Couplant
- Suitable Calibration blocks for material, Sensitivity, TCG and other required calibrations as required
Conclusion
Radiography replacement has become an industry trend and code accepted practice. Modern easier-to-use, less expensive portable phased array equipment and associated software has accelerated this practice in recent years. In some cases an immediate change of method may be difficult, impossible, or take some time to change the practice completely. Recent trends in phased array equipment have increased the use of phased array as a partial replacement or complement the radiographic method with many benefits.


