Background
Friction in moving metal parts causes heat and accelerated wear. Friction is significantly affected by the roughness of the sliding surfaces. If the surfaces are very rough with large peaks and valleys, the parts will not move smoothly and could even get stuck. On the other hand, if there are no peaks and valleys on either surface, the lack of any roughness whatsoever may cause the sliding surfaces to fuse together. To achieve the desired level of smoothness between moving metal parts, just the right amount of surface roughness is required. To measure surface roughness, manufacturers typically use contact roughness testers that drag a stylus across metal surfaces. This method is limited by the thickness of the stylus and is not capable of making fine roughness measurements.
The Olympus solutions
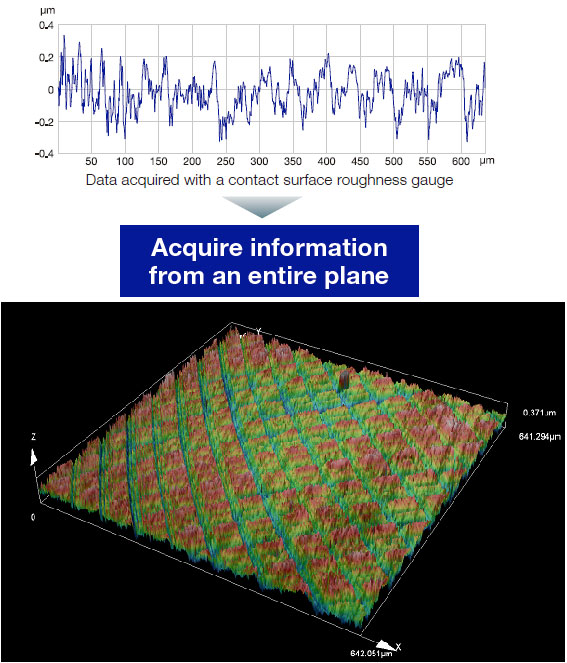
The Olympus LEXT 3D laser measuring microscope features a non-contact surface roughness tester that, unlike a stylus, gives you the ability to make planar measurements with a 10 nanometer resolution. This level of precision exceeds what is available with conventional contact surface testers and ensures that roughness measurements are as accurate as possible. Because the LEXT uses a laser to make the surface measurements, it can reach the bottom of tiny irregularities, including those with complex configurations and steep angles (Figure 1).
Features of the product
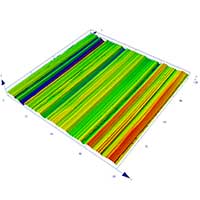
The LEXT makes 3D observations with ultra-high-resolution measurements and a high pixel density (Figure 2). The non-contact surface roughness measurement technology can measure fine irregularities that conventional contact measurers are unable to detect. The LEXT features high inclination sensitivity for making accurate measurements of complex and steep-sided irregularities.

Figure 1: A comparison of roughness measurements using a contact stylus (upper) versus the laser stylus of the LEXT (lower)
Image

Figure 2: A 3D rendering of surface roughness produced by the LEXT

