Thousands of people fly every day, so it’s no surprise that aircraft safety is a priority. Nondestructive testing (NDT) equipment enables safety inspectors to examine areas of the plane or helicopter that would be otherwise difficult or even impossible to inspect without component or structure removal that could potentially further damage or decrease the aircraft’s service life.
Here are 3 ways our NDT and remote visual inspection tools help inspectors ensure the safety of aircraft.
1. Expose defects
Many aircraft components are susceptible to fatigue, stress cracking, corrosion, and erosion after in-service life, and even one small defect undetected over time can cause failure. However, not every part of an airplane or helicopter is accessible to be visually examined by an inspector. This makes videoscopes an essential tool. Videoscopes have a long, narrow insertion tube that enables inspectors to remotely see into difficult-to-access areas, such as inside a jet engine, to check for flaws. The quality of the image and video is essential. Modern remote visual inspection tools, like the IPLEX® NX videoscope, have HD imaging technology and bright laser diode illumination to make it easier for inspectors to spot flaws. If an inspector does find a defect, the stereo measurement feature enables them to measure it for documentation or to monitor it over time. |  Inspecting a jet engine with a videoscope |
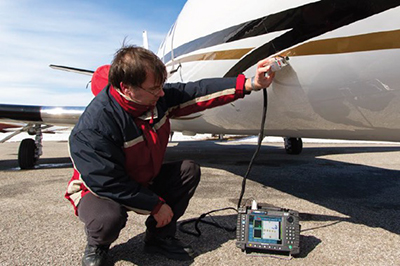
However, some flaws can’t be seen with the naked eye. Defects such as cracks and corrosion can accrue at load and stress attachment points, like fasteners between aluminum layers, and they can be concealed by the layers above. Eddy current array technology is used to detect these subsurface cracks and corrosion by inducing a magnetic field within the structure being examined. These defects will disrupt the amplitude and pattern of the eddy currents, helping alert you to potential defects. |  Inspecting an aircraft with eddy current array |
2. Identify bond defects in composites
Composites are increasingly common in the construction of aircraft, and some are made of more than 50% composites. Though they’re ideal for manufacturing
Disbonds occur when the bond-line breaks between the adhesive skin to the core and the composite components. These disbonds weaken the composite and the overall integrity of the structure. It’s possible to visually detect some disbonds due to the damage that occurs as a result, but others are visually undetectable. Similarly, delaminations occur when the laminated composite becomes separated and can be invisible to the naked eye. To solve this problem, ultrasonic testing and bond testing can be used in place of less reliable visual inspections.
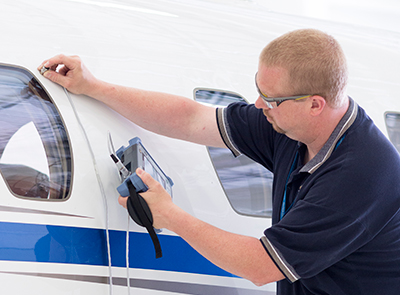
Sound waves are used to test for bond discontinuities. For example, the BondMaster® 600 multimode bond tester emits a low-frequency pulsed energy from a probe. If a discontinuity (such as a disbond or delamination) exists, the probe senses a change within the composite component, and it is either taken out of service or repaired and returned to service. If no discontinuity is present, the energy waves will continue to travel and disperse into the composite. |  Inspecting composite for disbonds |
3. Measure thickness and detect corrosion
Each component of an airplane needs to be within a specific range of thickness to operate safely. For example, airplane windshields must be thick enough to prevent cracking or shattering. Usually, aircraft windshields are constructed of two relatively thick layers of hard plastic with a thinner layer of soft material in between. If the window gets scratched, the scratches can be removed by polishing, but it’s important that the window maintains a safe thickness.
The thickness of the metal parts of an airplane is equally important. Thinning caused by corrosion can potentially cause fuselage ruptures and rapid decompression in a plane. The moisture and the extreme difference in temperatures an airplane encounters throughout its service can cause corrosion that thins the aircraft’s surface, which can eventually lead to severe pitting and destruction of the metal.
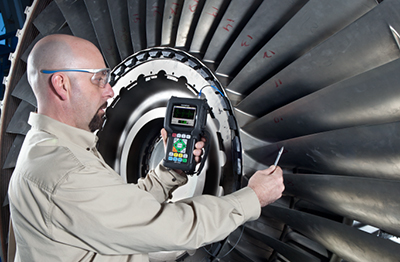
The same method that was used for checking bond defects can also be used to |  Measuring the thickness of a fan blade |
Related Content
Bring the Noise! How Sound Helps Keep Airplanes Safe
Thickness Measurement of Polymer Aircraft Windshields
Nondestructive Bond Testing for Aircraft Composites
Get In Touch
