People sometimes ask why they should use a measuring microscope. There are two specific situations that I quickly think of that call for a measuring microscope and some additional capabilities that these microscopes add.
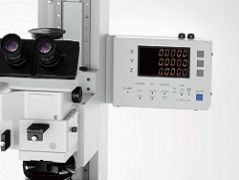
First is the need for very quick high-accuracy measurements. With a measuring microscope, this is accomplished when the operator simply places their sample on the stage and locates the starting point of the feature they wish to measure. They press the zero for the counter and then move across the feature to the end point. The display instantly shows the distance traveled.
Second is the need for high-accuracy measurements across large distances beyond the field of view of a traditional microscope. Measuring microscopes are designed to be accurate to within microns even when measuring features up to 300 mm (roughly 12 inches) in the X and Y axis and as high as 175 mm (roughly 7 inches) in height.
The capabilities of measuring microscopes can be further improved with items such as a laser autofocus. A laser auto focus can be added to a measuring microscope with a motorized Z-axis. This combination leads to a system with increased accuracy and repeatability by taking out the subjective component of each operator when they believe the feature is in focus.
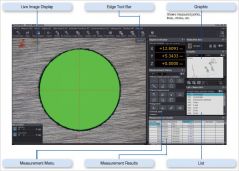
A measuring microscope can also be equipped with a digital readout (DRO) or with measurement support software to further enhance its capabilities. The use of these tools takes the microscope to the next level. Without a DRO or software, a measuring microscope provides coordinates of each point measured and leaves all the calculations up to the operator. With something as simple as a circle, getting the diameter can be tricky as you would have to measure the circle exactly in the middle to measure across; with the right software, any three points on the circle can be captured and the diameter is instantly calculated. Now consider that the circle is really a hole in your component, and you need to know if that hole is in an exact position; the software will tell you the coordinates of the center of the hole, and you can reference those back to a starting position on your component. The list of possible measurements is extensive, and the capabilities of these types of measurements will continue to grow as new software is developed.
Measuring microscope software has other capabilities, but what I like the most is creating testing routines. When an item is being mass-produced and samples need to be pulled for quality checks, isn’t it helpful when the software guides you through the test? Software can navigate the operator to each measuring point and then check the results of each measurement against design value and a tolerance factor. Software can also provide a simple pass/fail with something as easy as color-coding the results or exporting your data to your own plant management system.
All these are things to consider when getting ready to make your next microscope purchase.
Get In Touch
.jpg?rev=2D3E)

