8.5 曲面校正(CSC)
Curved Surface Correction (CSC)
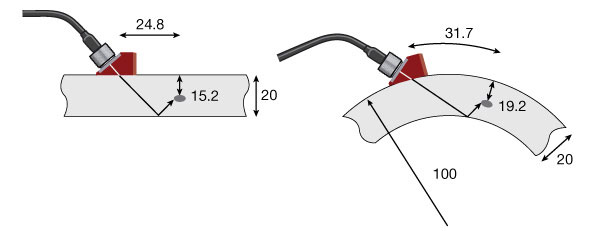
Curved surface correction (CSC) software is used to provide accurate measurement of reflector depth and position when working on curved test pieces. In the case of common flat plate tests and axially-oriented tests of pipes and similar products, leg length, reflector depth, and surface distance can be calculated through simple trigonometry. But when testing a curved part in the circumferential direction, these formulas become inaccurate due to the curvature that effectively caused reflectors to drop away from the probe, lengthening the sound path and changing the reflection angle at the inside surface of the part. For example, compare these measurements with a 45° beam in flat and curved plates both 20 mm thick. In a flat plate, as seen in the drawing below left, an echo at a sound path length of 35 mm corresponds to a reflector at a depth of 15.2 mm located 24.8 mm forward from the beam exit point. But without correction, the same 35 mm sound path in a 200 mm diameter pipe (100 mm OD radius) will produce incorrect dimensional measurements corresponding to a reflector 19.2 mm below the OD surface and 31.7 mm along the surface from the beam exit point to the point over the reflector, as seen below right.
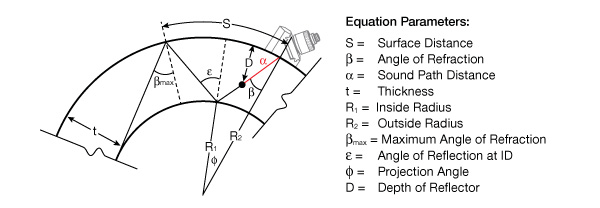
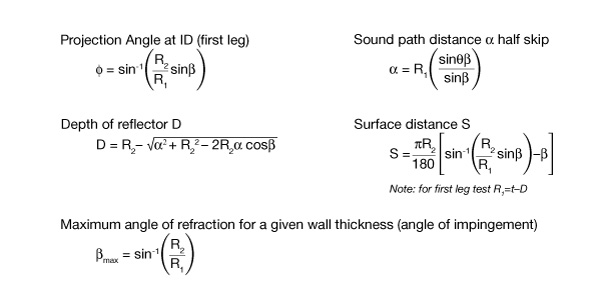
To correct for curvature, a number of mathematical relationships can be applied, based on the angles, measured sound path, and dimensions defined below. When implemented in software, these formulas enable proper calculation of surface projection and vertical depth of flaws. The operator inputs incident angle, part thickness, and part diameter, and the instrument applies appropriate trigonometric equations to adjust the measured sound path.
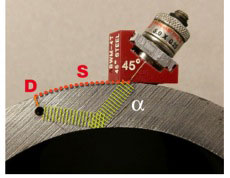
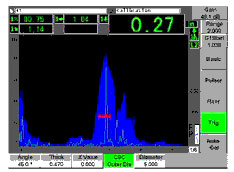
The example below shows the effect of CSC software on the measurement shown in the photograph. With CSC off, the displayed depth and surface distances are too low, and with CSC on the displayed numbers are corrected for the curvature.
 |  |
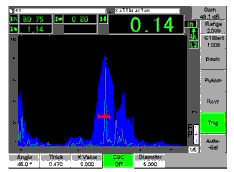 |  |
CSC off
|
CSC on
|