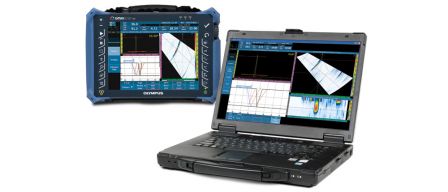
Mining and other industries utilize heavy equipment usually under the most demanding conditions. One critical component in heavy equipment is the many gears that allow equipment operation and movement. There are many different gears in shovels/draglines, trucks, loaders and also in a whole assortment of processing equipment like ore crushers and conveyance systems. Phased Array Ultrasonics can offer many benefits to these inspections. The application below can also be applied to other industries where similar equipment is used and anywhere critical gearing systems needs to be inspected.
Gear Inspections
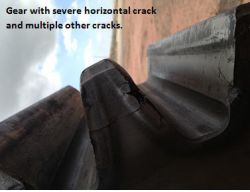
Gears come in many shapes and forms. Inside Mining equipment they are almost always covered in thick grease which requires extensive removal for most NDT methods to be applied and are also often quite large with many teeth that need inspection. They are also often hard to get to without removal of other components Because of their critical role in making the equipment operate and the expense of shutting down operation and removing and replacing these gears, knowing the condition of the gear teeth is of the utmost importance to mining operations. Gear failure can cause subsequent costly damage elsewhere in the piece of equipment and often getting a replacement gear can take a long time. When equipment shutdowns are performed that allow access to the gears they are inspected thoroughly and cracks are scrutinized and monitored. Crack length extent into the face of the gear is of most concern along with cracks that are getting close to connecting to one another. As much detailed info about the cracks that can be gathered will help make decisions on whether to repair or replace the gear.
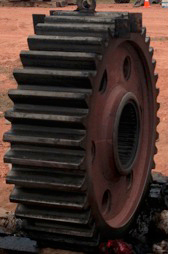 | 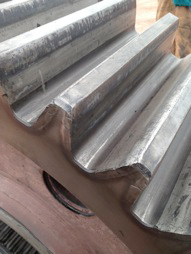 |
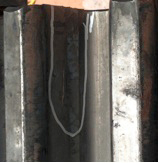
Bull (Spur) gear from 2800 P&H Shovel. Gears are removed when undercarriage is separated from body of shovel for maintenance inspections or at suspicion of problems.
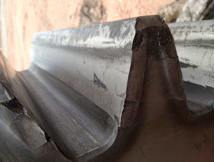 |  |
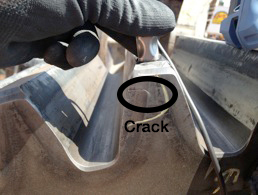
Cracking of Gear tooth on side of gear tooth and extending into face of gear.
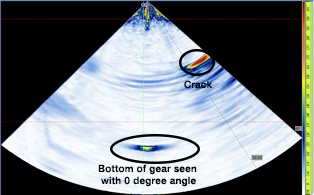
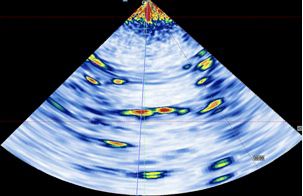
Magnetic particle or Liquid Penetrant can be performed to determine length of cracks. Magnetic particle and liquid penetrant require very timely thorough cleaning. Eddy current can also be used but will not give accurate depth measurement for cracks winding into the material. Conventional ultrasonics (0 and angle beam) can be done from the top land and face/flank surfaces to measure crack depth and length. With only one angle at a time cracks usually must be visually seen then various probe angles/surfaces are chosen to determine severity. Because it is only 1 angle at a time it can be difficult in some cases to be certain of cracks nature. Phased Array offers many benefits including multiple angle inspection to offer better detection and characterisation and only requires wiping down the excess grease, not extensive cleaning. Phased Array imaging allows monitoring of crack growth from inspection to inspection accurately with recorded images and associated A-scans versus just recorded lengths and depths from manual conventional ultrasonics. A Rexolite wedge can be used or alternatively removable contact wear face to protect the transducer matching layer. Data can be analyzed and reported on the spot or post reviewed and archived using OmniPC post analysis software on a PC.
 | 
|
 |  |
Phased Array Key Benefits
- Multiple angles allow for single probe and large coverage area of gear teeth from multiple surfaces
- Better detection and measurement of “winding cracks”
- Gear only needs to be roughly cleaned versus other NDT methods
- Imaging and data recording for crack monitoring and visualization of overall gear condition and connecting cracks versus single A-scans with conventional Ultrasonics
Equipment Used
OmniScan SX or MX2
- Portable for easy access to gears in or out of equipment
- Conventional and Phased Array capable for easy transition and correlation of traditional results
- Manual or encoded data
- Easy to use interface
- Ruggedized for harsh conditions
Phased Array Probes and Wedges
- Vary on application
- 5 MHz common frequency for most gear teeth sizes, smaller footprint (A10/A11 case for example)
- Flat Longitudinal Wave wedge or removable wear face. Angle beam wedges also available for inspection from face of gear where applicable
Optional Software and Accessories
- OmniPC Post Analysis Software


