DSX510i
已停产的产品
概要
This product has been discontinued, please check out our current products >>
| All in One Imaging Solution: Observation, Image Capture, Measurement, and SharingThe DSX510i inverted digital microscope is designed for observations and analysis of metal structures. The easy-to-use, all-in-one imaging system provides detailed analysis and reports. An intuitive touch screen-based user interface and up to 9,000x magnification enable users of various experience levels to obtain reliable measurement and inspection results. |
Observation
|
|
Image Capture
|
Measurement
|
|
Sharing
|
*The accuracy guarantee is based on conditions set by Olympus.
观察
Technology that Reveals What Couldn’t Be Seen Before
High NA — Low-Aberration Field Lenses
With lenses that have higher NA and lower aberration than current digital microscopes, plus improved evenness of light intensity, the DSX510 series of digital microscopes offer high resolution equal to the very best light microscopes.
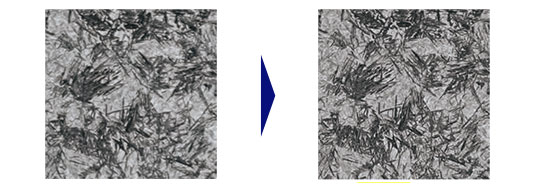
Bainite (Objective lens NA 0.4) Bainite (Objective lens NA 0.8)
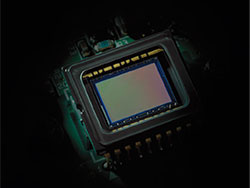
High-Resolution 18MP Images Reproduced with High-Performance CCD*
|
Olympus’s high-performance CCD is the engine that shows exactly what our high-quality optics reveal.
|
Zoom Optics Cover a Wide Range of Magnification
Optical Zoom: Get Closer to the Sample
The DSX510i offers optical zoom of up to 13X and digital zoom of up to 30X. A single optical lens can cover the typical magnification range of conventional light microscopes.
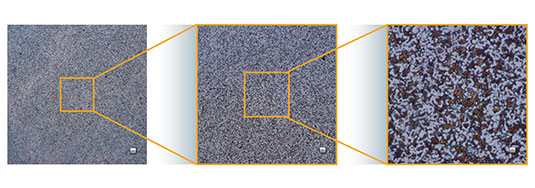
Zoom in on the sample
Two Lenses Can Be Mounted at Once: Nosepiece
Two lenses can be mounted at once for an even greater magnification range (70X to 9000X maximum range).
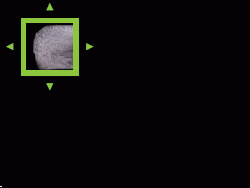
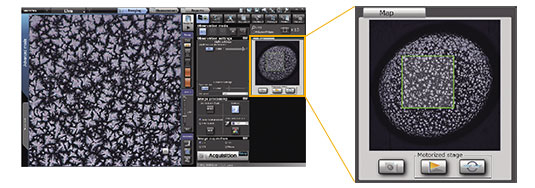
Macro Map: Always Know the Location
As zoom magnification is adjusted to a higher level, the area seen at one time is reduced — Macro map automatically records a full field-of-view image in a separate macro window.
A Variety of Observation Methods, Freely Usable
Quickly and Easily Acquire the Images Required for Observation
The DSX510i offers a variety of observation modes that deliver the highresolution images users expect from high-end optics.
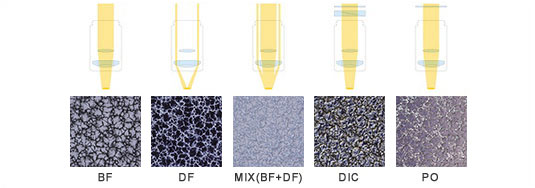
Choose the Observation Method with One Easy Click
With virtually every industrial observation method just a click away, the DSX510i makes it easy to choose the right one for the task at hand. No complicated adjustments needed — simply choose between modes (brightfield, darkfield, MIX [BF + DF], Differential Interference Contrast, polarized light) and start creating high-end images that meet precise demands. |
Advanced Image Processing
HDR: High-Definition Visuals Beyond the Human Eye
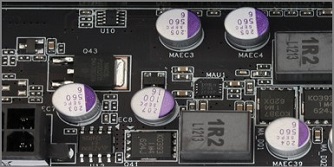
Sample appearance can vary depending on quality of material, surface conditions, or illumination methods. One of a variety of observation methods made possible by the advanced digital technology of DSX510i, the HDR (High Dynamic Range) function, combines several images taken at different exposures to accurately correct brightness differences on the sample surface, delivering a more consistently accurate sample rendition.
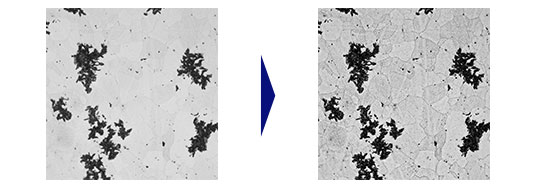
Anisotropic conductive film (ACF) on the LCD pattern
WiDER: Easy Inspection of Samples with High Reflectance Difference
The DSX510i eliminates this issue with WiDER, a proprietary image processing system that takes care of high-contrast problems with one click. No blackouts. No glare.
Color Enhancement: See Only What’s Required
The color enhancement feature of DSX510i allows color to be placed where it is needed while leaving the rest of the image in black-and-white, making it much easier to locate defects. Ideal for focusing on one particular defect.
Anyone Can Make Observations in Optimum Conditions
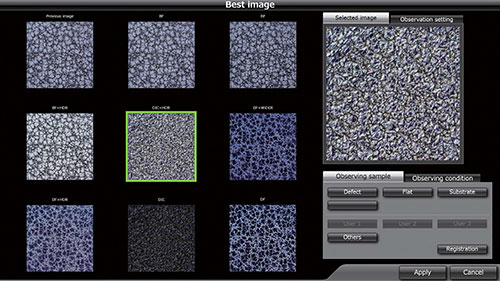
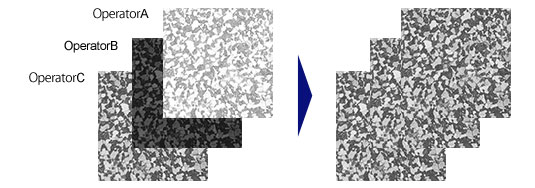
Best Image Function Ensures Optimal Performance from Any Operator
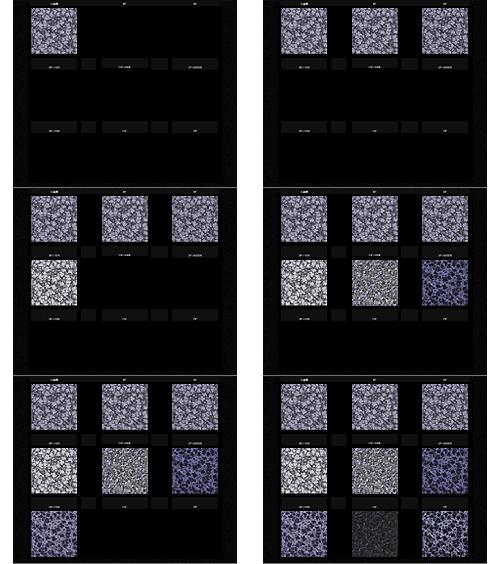 | The DSX510i will set all the necessary parameters to achieve that image. The Best image function ensures optimal images, whether looking for defects, uneven surfaces, or foreign objects. With Best image, anyone can operate the system — beginner to expert — and it can be customized for each operator. |
Try DSX(Best Image)>
To Related Video >
Repeatability: Easily Recall Any Inspection (Observation) Setting
The mechanisms of DSX510i fully digitalized so that every image taken or saved has the conditions it was taken under recorded with the image. If an image is captured with the DSX510i, the operator can retrieve the conditions of capture from the image data with one click, enabling additional observations under the same conditions and settings.
拍摄
Capture Full-Focus Images or 3D Images
EFI: View Uneven Samples in Focus Across the Entire Image
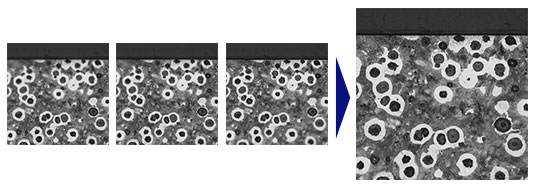
With its EFI (Extended Focal Image) capability, the DSX510i can obtain a clear, in-focus image of an entire sample with one click — no matter how uneven the surface. During EFI, several images are taken while the point of focus is moved up and down. From these images, the areas where the sample was in focus are combined into one image where the whole sample is in focus, allowing precise inspection of uneven surfaces. Olympus’s EFI capturing speed is now faster than ever.
3D Image: One Click Shows the Sample in 3D
With one click, the DSX510i can capture image samples in three dimensions, allowing examination from any angle and a view of the sample as it actually is. With detailed 3D images, sample features or unevenness can be viewed and measured. Height differences and volume can also be measured, making it easier to accurately analyze the sample.
Live Panorama Capturing Covers Large Areas Fast
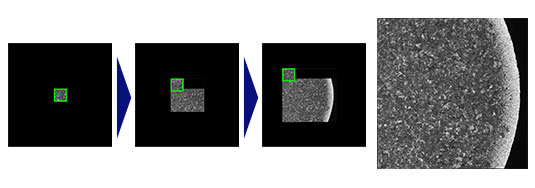
There is no longer such a problem as “outside the field of view.” With Live panorama, simply move the observation position on the screen, and the motorized stage will move the sample to that position. As the stage moves, the system automatically stitches images into a large single field of view, in real time.
Try DSX(Stitching)>
To Related Video >
Auto Panorama: One Click Captures a Large Field of View
Simply put the sample on the stage, and start the process with one click. The stage moves in a spiral and the feature captures the required area automatically.
Manual Panorama: Prioritize a Required Area
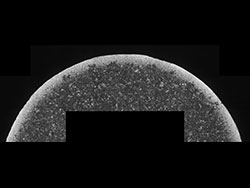 | Obtains real-time image stitching of the desired area in a very short time, by moving the stage vertically, laterally and obliquely. |
Automatic Stitching Gives High Quality, High Value-Added Image
High Quality Panorama
Set the number of images, the length, and the starting point, then start the image stitching process. This executes pattern matching and corrects shading, resulting in a high-quality and high value-added image.
EFI and 3D Image Capturing
High quality panorama capability can be coordinated with EFI and 3D image capturing as well. The ability to capture images across a wide area, show uneven surfaces in full focus, and produce 3D images means the data exceeds that of ordinary digital microscopes.
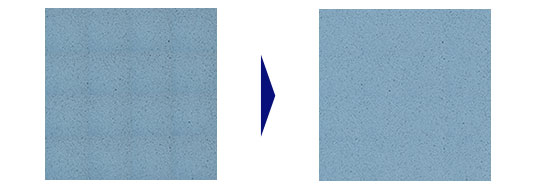
Improved Algorithms for Pattern Matching and Shading Correction
Wide angle, high-resolution and high-quality images are realized with optimized pattern matching and no misalignment.
Large Amounts of Data Automatically Captured
Programmed Recipes: Automatically Capture Independent Points
Through a convenient programmed recipe function, the DSX510i can automatically capture images of several registered points with autofocus.
测量
Advanced Technology Supports Precise Measurement
Accuracy and Repeatability Guaranteed
The DSX510i delivers precise and repeatable measurements, with accuracy traceable to national standards.
- •To guarantee XY accuracy, calibration work must be undertaken by Olympus’s dedicated service staff
- •To issue certificates, calibration work must be undertaken by Olympus’s dedicated service staff
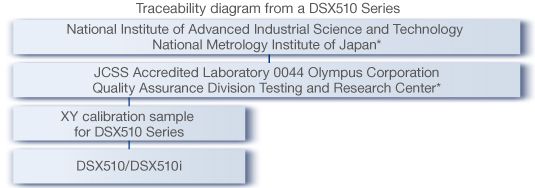
*Differs according to national and regional statutes
The DSX510i Features Telecentric Optics
With telecentric optics, the image size is not altered with changes in focus. Since the image size does not change, precise measurement can be taken without concern for dispersion.
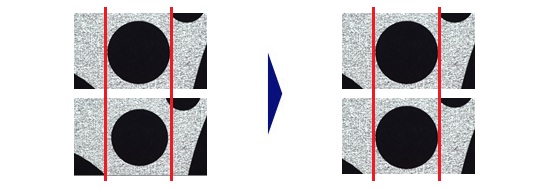
Point of focus Higher / Lower
Ample Measurement Functions
The Features Required to Ensure Optimal Measurement Results
All fundamental industrial microscope measurement capabilities are standard features of DSX510i software, making it easy to obtain optimal measurement results. Optional software is available for 3D measurement, caliper measurement, and particle analysis.
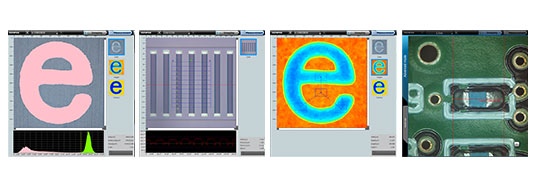
Area/Volume Caliper
Step Live measurement
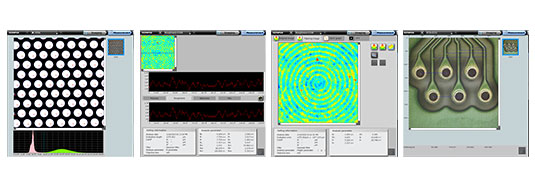
Particle Line roughness Surface roughness Geometric
A Higher Level of Measurement and Analysis
Automate Measurement with a Simple Wizard Function
Using the simple wizard function of DSX510i, many measurement processes can be easily automated. Once an image is created, the measurement wizard can run automatically or the wizard can also be connected to an automatic image capturing wizard, further automating the imaging and measurement process.
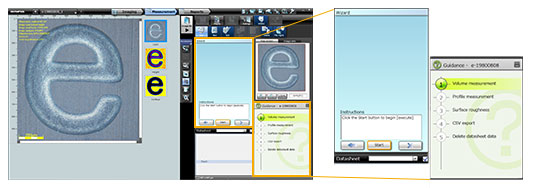
Measurement wizard
Advanced Material Analysis with OLYMPUS Stream
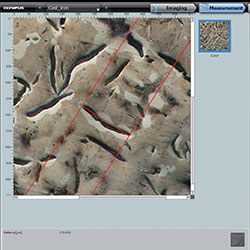
Granularity analysis, cast iron analysis, non-ferrous metal inclusions analysis, chart comparisons, advanced particle analysis — virtually every metallography evaluation can be done with optional OLYMPUS Stream image analysis software.
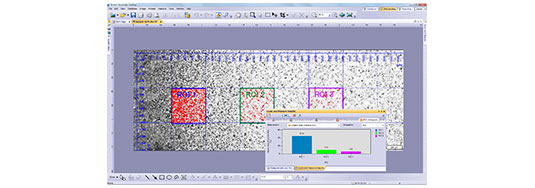
共享
100% of All Data Can Be Shared
Custom Report Generation Made Easy
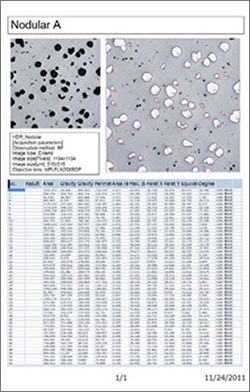
With the DSX510i, It’s easy. Operators concentrate on image capture, observation, and measurement, and the DSX510i automatically generates the relevant reports. Report templates are fully customizable.
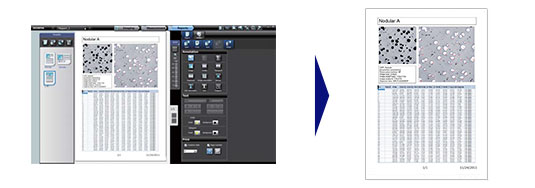
A click can generate a report Report output
Designates Printing Magnification from OLYMPUS Stream
OLYMPUS Stream reports can then be printed by specifying a scaling factor.
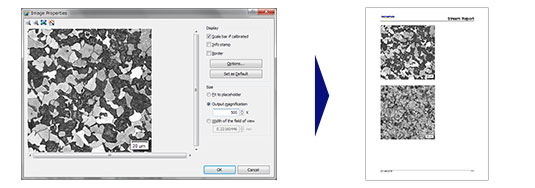
Magnification setting Printing
技术规格
DSX510i Specifications
| Main frame > Zoom ratio | 13.5X optical zoom (0.26X to 3.5X), 30X with digital zoom |
|---|---|
| Main frame > Number of attaching objective lenses | up to 2 pieces |
| Main frame > DSX dedicated objective lens | XLMPLFLN10X, XLMPLFLN40X |
| Main frame > Mountable objective lens > UIS2 objective lens |
MPLFLN1.25X, MPLFLN2.5X, MPLFLN5XBDP, MPLFLN10XBDP,
MPLFLN20XBDP, MPLFLN50XBDP, LMPLFLN10XBD, LMPLFLN20X, LMPLFLN50X, MPLAPON50X |
|
Main frame > Accuracy and repeatability
(X-Y plane) > Accuracy of magnification | ±3%*2 |
|
Main frame > Accuracy and repeatability
(X-Y plane) > Repeatability of magnification | 3σn-1= ±2% |
| Main frame > Repeatability (Z axis) > Repeatability of height | - |
| Main frame > Illumination > Embedded standard | Bright field: LED, Dark field: LED |
| Main frame > Illumination > Optional illumination | High intensity LED*1 |
| Main frame > Camera > Image sensor |
1/1.8 inch, 2.01 megapixels, color CCD (total pixels: 2.10 megapixels)
Total pixels : 1688 (H) x 1248 (V) Available pixels : 1628 (H) x 1236 (V) Effective pixels : 1600 (H) x 1200 (V) |
| Main frame > Camera > Cooling method | Peltier cooling |
| Main frame > Camera > Scan mode | Progressive scan |
| Main frame > Camera > Frame rate | 15 fps/27 fps with binning mode |
| Main frame > Camera > Image size |
Normal : 1194 x 1194 (1:1)/1592 x 1194 (4:3)
Fine : 1194 x 1194 (1:1)/1592 x 1194 (4:3) Super fine : 3594 x 3594 (1:1)/4792 x 3594 (4:3) |
| Main frame > Camera > Sensitivity | ISO 100/200/400/800/1600 equivalent |
| Main frame > Focusing unit > Stroke | 35 mm |
| Main frame > Focusing unit > Resolution | 0.01 μm |
| Main frame > Maximum sample height > DSX dedicated objective lens | - |
| Main frame > Maximum sample height > UIS2 objective lens | - |
| Stage > Motorized stage > Model | DSX-IFSSU |
| Stage > Motorized stage > Stroke | 50 x 25 mm*3 |
| Stage > Motorized stage > Load capacity | 1 kg |
| Stage > Manual stage > Model | DSX-SFR |
| Stage > Manual stage > Stroke | 50 x 25 mm*3 |
| Stage > Manual stage > Load capacity | 1 kg |
| LCD monitor > Size | 23” with touch panel and Full HD color LCD monitor |
| LCD monitor > Resolution | 1920 (H) x 1080 (V) |
| Weight > (Main frame, Motorized stage, LCD monitor, Control box, Controller) | Approx. 44.1 kg |
| Input rating | 100-120 V/220-240 V, 300 V A, 50/60 Hz |
*1 Cannot be used with the embedded standard LED. *2 Calibration by Olympus or dealer specialists necessary. *3 When the objective lens MPLFLN50XBDP or MPLAPON50X is attached, the stroke is 25 x 25 mm.
** The OS license of Window 10 has been certified for the microscope controller (PC) provided by olympus. Therefore, Microsoft's license terms are applied and you agree to the terms.Please refer to the following for Microsoft license terms.
https://www.microsoft.com/en-us/Useterms/Retail/Windows/10/UseTerms_Retail_Windows_10_japanese.htm
DSX510/510i Series objective lens
| Series | Model | Parfocal distance | NA | W.D. (mm) | Actual F.O.V. (μm)*3 | Total magnification*4 |
| DSX dedicated objective lens | XLMPLFLN10XDSX*1 | 75 mm | 0.3 | 30.0 | 2,772-214 | 139X-1,803X |
| XLMPLFLN40XDSX*1 | 0.8 | 4.5 | 693-54 | 555X-7,211X | ||
| UIS2 objective lens | MPLFLN1.25X*2 | 45 mm | 0.04 | 3.5 | 22,181-1,706 | 17X-225X |
| MPLFLN2.5X*2 | 0.08 | 10.7 | 11,090-853 | 35X-451X | ||
| MPLFLN5XBDP | 0.15 | 12.0 | 3,921-302 | 69X-901X | ||
| MPLFLN10XBDP | 0.25 | 6.5 | 2,772-214 | 139X-1,803X | ||
| MPLFLN20XBDP | 0.4 | 3.0 | 1,386-106 | 277X-3,606X | ||
| MPLFLN50XBDP | 0.75 | 1.0 | 554-42 | 693X-9,014X | ||
| LMPLFLN10XBD | 0.25 | 10.0 | 2,772-214 | 139X-1,803X | ||
| LMPLFLN20XBD | 0.4 | 12.0 | 1,386-106 | 277X-3,606X | ||
| LMPLFLN50XBD | 0.5 | 10.6 | 554-42 | 693X-9,014X | ||
| MPLAPON50X*1 | 0.95 | 0.35 | 554-42 | 693X-9,014X |
*1 DF and MIX are not available *2 Available for BF only *3 At aspect ratio 1:1 diagonal (with factory default value) *4 At aspect ratio 1:1
应用
See how the DSX microscope's advanced digital imaging technology improves the quality of your automotive or electronic device inspection.
Please click the images for special pages.
【Solution for Automotive】 |
【Solution for Electronics】 |

