Background
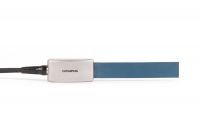
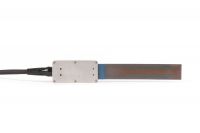
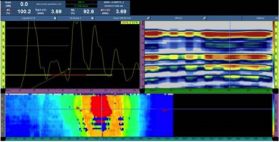
Performing high-resolution ultrasonic thickness mapping of complex shapes with changing geometries, such as elbows, is very challenging. To address such applications, Olympus has developed its first flexible ultrasonic phased array probe that is capable of conforming to complex shapes creating new opportunities for more applications.
Problem
To map the thickness of a component, conventional ultrasonic probes must be held perpendicular to the surface at every point of data acquisition. This process is slow and corrosion pits can be missed between acquisition points. Using ultrasonic phased array allows large areas to be rapidly scanned at high-resolution, but standard linear phased array probes are rigid and cannot conform to changes in component geometry. Olympus has developed a solution to this problem with its new flexible ultrasonic phased array probe designed for high-resolution thickness mapping of complex shapes. Potential applications for such probes include the inspection of elbows, bends, nozzles, or any part with variable geometry.
Solution
The new flexible phased array probe was designed and manufactured to have both flexibility and mechanical integrity combined with improved acoustic properties. The probe is constructed of SC 1-3 flexible composite that provides flexibility, acoustic impedance, and scalability.
The flexible ultrasonic phased array probe has the following parameters:
| U8 number | Part number | Frequency (MHz) | Number of elements | Pitch (mm) | Active aperture (mm) | Elevation (mm) |
| Q3300182 | XACT-10036 | 5 | 64 | 1 | 64 | 6 |
The mechanical integrity of the probe was tested by flexing it 500 times across a 2-inch radius at 10 cycles per minute. All elements of the probe continued to work perfectly and no damage was observed.
The acoustic properties of the probe were also tested. The flexible probe generated acoustic beams just like any standard phased array probe with the same parameters. The flexible probe exhibited a beam steering of ±30 LW without grating lobes.
The bandwidth of the ultrasonic pulse is around 65% with a center frequency of 5.0 MHz. For corrosion or thickness mapping, this is an acceptable compromise considering the advantages of the probe’s flexibility.
When the probe is in direct contact with a metallic part, the dead-zone is typically 5 mm. When a delay line such as Aqualene is used, the dead zone can be reduced to 2–3 mm.
Results
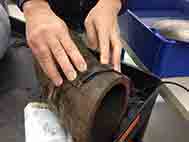
The flexible phased array probe connected to the OmniScan MX2 was tested on two elbow pipes with evidence of internal corrosion. Focal laws with 4 elements were used, and a 0° LW linear scan over the length of the probe was produced. The resolution of the scan was 1 mm × 1 mm.
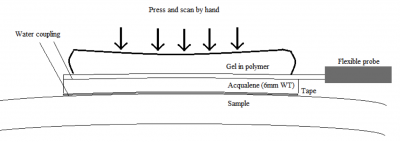
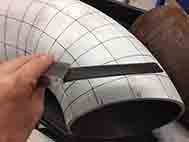
The probe was mounted on a flexible delay line made with Aqualene to provide better contact with the part and reduce the dead zone. A layer of polymer gel was mounted on the back of the probe to equally distribute the pressure from the operator (Figure 2). An encoder was attached to this assembly. (Note that the holder assembly is experimental and not yet commercially available).
Elbow #1
Elbow #1 had an outside diameter of 170 mm, a wall thickness of 17 mm, and exhibited internal corrosion (Figure 3). The probe scanned along the axis of the pipe as shown in Figure 3.
The surface was covered with a resolution of 1 mm × 1 mm. Small internal corrosion pits are clearly visible in the B-scan and C-scan images (Figure 3). The software displays the position of the pits and enables quick measurement of depth and size.
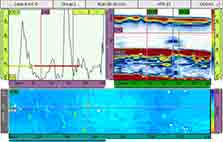 | 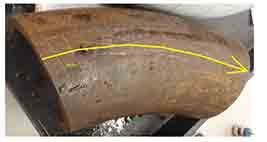 |
Figure 3: Left: B- and C-scan images of corrosion pits. Right: 170 mm OD elbow.
Elbow #2
Elbow #2 had an outside diameter of 220 mm and a wall thickness of 7 mm (Figure 4). This component has degradation from flow accelerated corrosion (FAC).
The C-scan clearly shows the region of FAC as a growing, gradually corroded area (Figure 4). Red denotes the area of thinner remaining wall while blue shows the area of nominal wall thickness (Figure 4). It is easy to measure both the size of the corroded area and the minimum remaining wall.
These tests demonstrate that the flexible phased array probe is flexible enough to conform to the elbows and that it correctly maps the thicknesses of complex shapes.
Important note
While the flexible ultrasonic phased array probe is useful for complex shape inspection, it should not be considered a heavy-duty tool. You must carefully apply constant pressure on the probe to maintain good signals. Also, the surface of the probe must be protected during the scan. If the probe face is rubbed directly against rough surfaces, it will deteriorate. When used in direct contact with metallic parts, the probe’s surface should be protected with Teflon tape. The use of a flexible delay line is recommended. A holder assembly for the flexible phased array probe is not commercially available at this time.
Considering these limitations, the flexible phased array probe is still very useful when used with proper care.
Conclusion
The flexible phased array probe demonstrates its ability to undertake complex shape inspection on parts such as elbows. It can scan complex components with changing geometries and perform high-resolution thickness mapping.
The flexible probe produces sector and linear scans just like a standard phased array probe.
Note: The flexible PA probe has been designed with specific applications variables in mind. With its current design, this probe is not be suitable for all applications and use cases. For additional information, please contact SCE.PM@olympus-ossa.com
