This application note will explain how to measure the wall thickness of hollow metal turbine blades.
Turbine Blade Wall Thickness
Many turbine blades used in aircraft engines and other high-performance systems are hollow to permit the circulation of coolant within the blade. Core shifts during casting, faulty machining, or normal surface wear during operation can cause blade wall thickness to fall below acceptable limits. Mechanically measuring wall thickness is usually not possible without destroying the blade. However, with proper transducers and instrumentation this measurement can often be done ultrasonically.
Ultrasonic Equipment Used to Measure the Wall Thickness of Turbine Blades
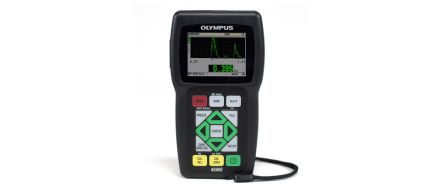
Precision thickness gauges are commonly used for turbine blade measurements. These include the 38DL PLUS™ gauge and the 45MG gauge with Single Element software and waveform display option. They are typically used with immersion or delay line transducers that are selected according to the thickness and geometry being measured. The gauge’s waveform display enables a trained operator to monitor waveforms to help ensure valid echo detection. It also helps ensure optimal transducer alignment.
The 72DL PLUS™ gauge is a high-speed instrument that offers fast measurements for turbine blade manufacturing and inspection. The gauge features a 60 Hz display update and up to 2 kHz measurement speeds. The instrument also has a wide 7 in. touch screen, offering great visibility from different angles. With various connection options (wireless LAN, Bluetooth®, and Ethernet) and data management tools, the 72DL PLUS gauge can help optimize inspection workflows and improve throughput.
Procedure to Measure the Wall Thickness of Turbine Blades
The exact measurement system that is recommended for a given turbine blade application depends on customer requirements and the blade’s acoustic properties. Here are some basic considerations:
Transducer Type: Both delay line and immersion transducers are used in turbine blade applications. However, the curvature of small turbine blades can make it impossible to properly couple delay line transducers into the concave side. The 0.125 in. (3 mm) delay line transducers (M203 and M208) generally couple adequately onto concave radii down to about 4 in. (100 mm). With contouring of the delay line, it is possible in some cases to couple onto sharper radii. But in general, sharply curved surfaces—particularly the leading edge of blades—are better measured with immersion transducers. The 20 MHz V316-B transducer in a B-120 bubbler provides a convenient handheld assembly for immersion transducer measurement of blades. In many cases it is also possible to use the V260-SM Sonopen™ focused delay line transducer to couple onto concave surfaces that cannot be measured with conventional delay lines.
In addition to the standard line of immersion and delay line transducers, we offer three special low-profile 20 MHz delay line transducers for turbine blade thickness measurements in multi-blade assemblies where the space between blades is limited and access is difficult. The M2054 is a 20 MHz delay line transducer just 0.27 in. (6.75 mm) thick on a 3 in. (75 mm) handle. The M2055 is similar with a transducer/delay line assembly that is 0.40 in. (10 mm) thick. The V2034 delay line transducer has a 0.40 in. (10 mm) head on a 6 in. (300 mm) angled handle. Outline drawings of these transducers are available on request.
Measurement Mode: Using delay line and immersion transducers, thickness measurements can be made in either Mode 2 (interface to first back echo) or Mode 3 (echo to echo following interface). Mode 3 provides better thin material resolution than Mode 2, but this is possible only if the points to be measured on the turbine blade produce multiple back wall echoes. If there is only a single useable back wall echo (due to curvature or attenuation), measurement must be done in Mode 2. The 38DL PLUS and 45MG gauges can operate in either Mode 2 or Mode 3. Establish the optimal setup for a given turbine blade application using reference standards with the range of thickness and geometries to be measured.
Thickness Range: In typical metal blades, the minimum resolvable thickness for a 20 MHz delay line or immersion transducer is approximately 0.006 in. (0.15 mm) in Mode 3, and 0.020 in. (0.5 mm) in Mode 2. For thinner materials below 0.006, the high-frequency version of the 72DL PLUS gauge can be used. Most turbine blade measurements are done at 10 MHz or 20 MHz.
Dead Spots: Hollow turbine blades often contain assorted structures inside the blade to direct the coolant flow or add strength to the blade. Generally, it is not possible to obtain a back wall echo from points where these vanes or ribs are located because the structure disrupts the smooth inside surface needed for a good reflection. In cases where these structures are closely spaced, a focused immersion transducer with a small spot size produces better back wall echoes than a delay line transducer. There are also some cases where sharply tapering blade thickness can create a situation where inside walls and outside walls are significantly non-parallel, which can cause echo distortion and potential measurement errors.
In all cases, determine the combination of transducer and instrument based on tests using actual product samples. The wide variation in turbine blade geometries makes sample evaluation important.
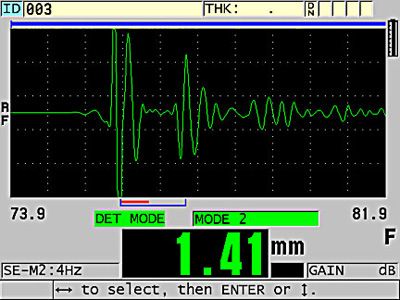
Figures 1–3 show typical waveforms associated with turbine blade measurements performed with a 38DL PLUS gauge. The gauge display screen instantly provides the live ultrasonic waveform with gates and thickness readings. This is ideal for difficult applications or when setup parameters need closer examination.
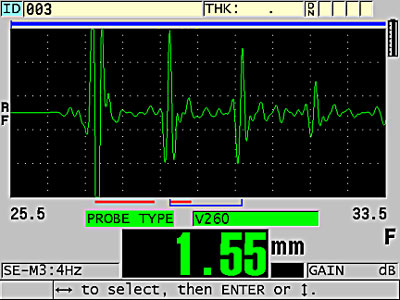
Figure 1. Mode 3 measurement of a turbine blade
Figure 1 shows a Mode 3 measurement of a 0.041 in. (1.05 mm) thick concave turbine blade trailing edge using an M208 transducer. The curvature has a sufficiently large radius at the measurement point that the M208 transducer couples well into the material, and the clean multiple echoes permit a Mode 3 measurement.
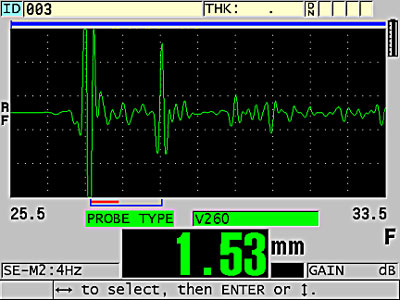
Figure 2. Mode 2 measurement of a turbine blade
Figure 2 shows a Mode 2 measurement of a 0.070 in. (1.8 mm) thick convex turbine blade wall, also using an M208 transducer. Here the presence of internal ribs damps the echoes somewhat, and in the absence of clean multiple echoes a Mode 2 measurement is recommended.
Figure 3. Immersion technique to measure curved convex blade section
Figure 3 shows an immersion technique using a V316-BB 20 MHz immersion transducer with a B-120 handheld bubbler to check a thicker (0.051 in. or 1.3 mm) sharply curved (1 in. or 25 mm radius) convex blade section, where the sharp convex curvature made coupling a delay line transducer difficult. In this type of measurement, especially on concave surfaces, it is essential for the operator to monitor waveforms to help ensure optimal transducer alignment.
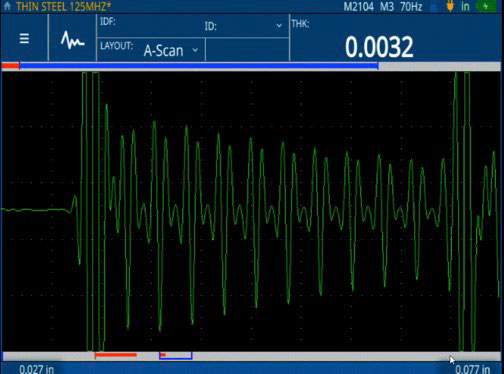
Figure 4: Thin thickness measurements (0.0032 in.) of thin steel performed with the 72DL PLUS gauge
Figure 4 shows a direct contact M2104 125 MHz transducer on a 0.0032 in. (0.076 mm) thin metal shim and is shown to demonstrate the minimum thickness capability of the 72DL PLUS gauge. A full line of highfrequency transducers from 30–125 MHz are available to use with the 72DL PLUS gauge for a variety of thin thickness applications.
Note: Certain turbine blades cast from large-grain alloys can exhibit significant velocity variation from point to point due to anisotropic grain structure. In these cases, the accuracy of ultrasonic thickness gauging will be limited by the degree of velocity variation. This limit must be determined experimentally for specific cases.
