Ultrasonic thickness gaging isn’t limited to testing materials at normal (ambient) temperatures. Measurements can be made on materials whose surface temperature approaches 900 °F (500 °C). When working with metals, there may be times when the thickness needs to be measured during an ongoing process where the test piece can’t be cooled down.
Heat can complicate the accuracy and efficiency of your measurements. If you use the wrong transducer, the heat can damage it and shorten its useful life. These 8 tips will help you overcome the challenges of testing hot materials.
- Use a High-Temperature Dual Element Transducer
The thickness of hot corroded metal with rough surfaces should be measured using a high-temperature dual element transducer. It’s critical to choose a transducer that’s rated for use at the temperature of your inspection. Below are some of our most common high-temperature dual element thickness gage transducers:- D790: for intermittent contact up to 932 °F (500 °C)
- D791: for intermittent contact up to 932 °F (500 °C)
- D797: for intermittent contact up to 752 °F (400 °C)
- Use a High-Temperature Couplant
Special high-temperature couplants are required at temperatures greater than about 200 °F (100 °C). Standard B2 glycerin couplant is not rated for temperatures above 200 °F, so using it will result in a loss of signal and potential damage to the transducer. Instead, choose a high-temperature couplant that’s rated for the temperature of your inspection. A variety are readily available:- H-2: medium-temperature couplant for use up to 750 °F (398 °C)
- I-2: high-temperature couplant for use up to 1250 °F (675 °C)
- Use the 38DL PLUS® Gage’s Temperature Compensation Feature
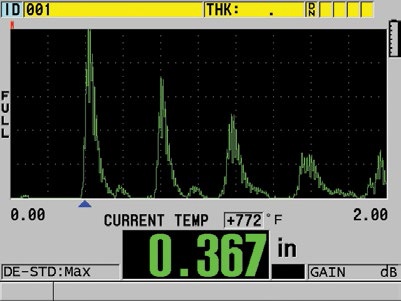
Sound velocity in all materials changes with temperature. Normally, the velocity increases as the material gets colder and decreases as it gets hotter, with abrupt changes near the freezing or melting points. Velocity changes are related to changes in elastic modulus and density, and, depending on the material and temperature range, the relationship can be significantly non-linear. Measuring hot materials with a thickness gage set to the sound velocity at room temperature can lead to incorrect readings. For maximum accuracy, you need to account for the effect of the higher temperature on the velocity of sound. To do this, calibrate the gage’s sound velocity setting to the temperature where measurements will be made. This can be tedious and difficult to accomplish, but the 38DL PLUS gage includes a temperature compensation feature that, when active, automatically adjusts for the change in sound velocity based on temperature values that you enter before the inspection.
- Increase the Thickness Gage’s Measurement Update Rate
Increasing your thickness gage’s measurement update rate helps to reduce the amount of time the transducer needs to be in contact with the hot surface.
- Apply Couplant to the Tip of Your Transducer, Not the Surface of the Material
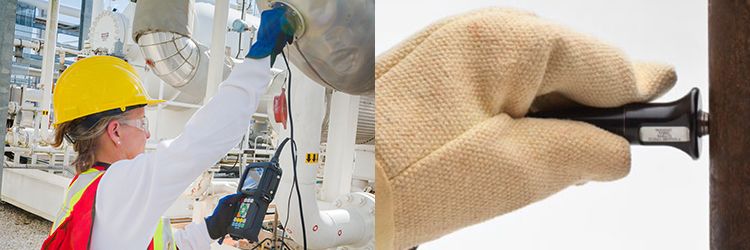
If you apply couplant to the surface of the hot material, it’ll most likely burn off before you can make a measurement. Instead, apply an appropriate couplant to the tip of the transducer, and couple it to the hot surface using firm pressure.
- Limit the Transducer Contact Time to 5 Seconds
If you can’t obtain a valid thickness reading in 5 seconds, uncouple the transducer from the hot surface, apply more couplant to the tip of the transducer, and try again.
More advanced instruments, like the 38DL PLUS and 45MG gages, allow the user to freeze the measurement screen. This is a key feature that can be used for high-temperature measurements since it enables you to briefly couple onto the sample, press the FREEZE key, uncouple the transducer, and then make measurement adjustments to the frozen A-scan.
- Regularly Perform a “Do ZERO”
We discussed that a material’s sound velocity changes with temperature, so as the delay lines within the dual element transducers heat up, they transmit sound at a different speed. To compensate for this, you should periodically perform a “Do ZERO.”
This can easily be done by first wiping the couplant off the face of the transducer and then pressing and releasing the 2nd F key followed by the CAL ZERO key. Pressing these keys causes the instrument to compensate for any thermal drift in the transducer.
- Never Let the Transducer Get Too Hot to Hold
If the transducer starts to become too hot to hold with bare hands, let it cool in air or dip the face of the transducer in water. You should then re-zero by performing a “Do ZERO.”
Related Content
High-Temperature Ultrasonic Testing
Ultrasonic Thickness Measurements of Hot Metals
Introduction to Thickness Gaging
Get In Touch
