Measuring the thickness of critical piping infrastructure is a common inspection task in the oil & gas and other industries where piping carries material. Ultrasonic thickness gages are used to make precise measurements at set condition monitoring locations (CMLs) on the pipes. The data is recorded and saved to help monitor thickness changes over time and plan maintenance. However, analyzing and recording all these thickness readings can be complicated, especially when you’re dealing with hundreds of CMLs.
Data Management Challenges
Writing out thickness readings by hand used to be the norm and is surprisingly still quite common today. But whenever handwriting is involved, there’s the potential for human error. To make matters worse, handwritten readings need to be transcribed into a more formal report or database to effectively track and store the data, introducing another opportunity for error. And as any inspector knows, the consequences of recording a wrong thickness measurement can be expensive, or even dangerous.
Today, digital dataloggers are common. They can store measurements and A-scans in their internal memory or on a removable memory card. While digital dataloggers offer clear advantages over handwritten records, they have their own challenges. The data is still physically transferred, either in a memory storage card or in the instrument’s internal memory, from the inspection site back to the office for analysis. This slows down and complicates the process. It can be weeks before all the data is analyzed and potential problems identified. Meanwhile, the plant has continued operating with an asset that’s potentially unsafe. In the best case, the inspection company will still have to go to the expense of redeploying a team to further examine any problem areas.
Another issue is that some owner/operators and inspection service providers (ISPs) have created their own inspection data management system (IDMS) software that enables them to more effectively track and manage data. This development process can be expensive, and it’s often difficult to make changes to the system once it’s up and running.
Challenges of Thickness Gage Data Management
Not every inspector has moved on from handwritten gage readings; some stick to it because they’re comfortable with the system and because it’s relatively low cost. Companies that have gone digital are faced with other challenges.
One of the biggest is compatibility issues. Owner/operators, rather than inspection companies, typically own the license for the IDMS software due to the cost. And not all owner/operators are using the same one. For the inspection company, it can be difficult to learn these different systems.
Compatibility between the instrument and interface program can also be challenging since older software versions may not work with a newer version of the device’s firmware. Dealing with drivers and firewalls is another complication as well as training users on the ins and outs of the datalogger functionality.
Going Wireless—Benefits of the Cloud for Data Management
Wireless connectivity makes it easy for inspectors to transfer their data directly to an Olympus Scientific Cloud™ app, such as the Inspection Project Manager (IPM).
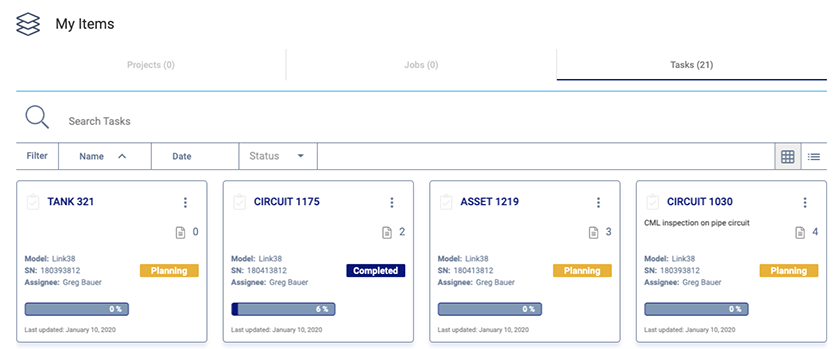
The IPM enables you to create and manage your projects from anywhere in the world. Within each project, you can set up jobs and tasks that you can assign to specific members of your organization. Within each task, you can add relevant documents, such as work instructions and site maps. Inspectors in the field can connect their instrument to a WLAN network or mobile hotspot to download the survey files. He or she can then take all the necessary measurements and upload the file back to the Cloud for analysts to review. Since everything’s digital, there’s no need for handwritten results. All this can be accomplished while the inspector is still in the field, enabling problems to be identified sooner, even before the inspector has finished the job.
There’s also benefits for the manager. A dashboard shows progress on all levels of the inspection job for more efficient workflows and better visibility to project status.

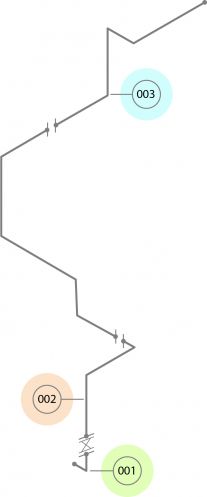
Digital isometric drawings enable accurate record keepingSometimes inspectors handwrite results on a drawing of the asset being inspected. A feature we’re currently developing for the IPM will provide even better functionality—users will be able to send readings wirelessly from the thickness gage directly to a digital isometric drawing on the inspector’s tablet. If there are any questions during the inspection, the tablet and Cloud could also facilitate collaboration between an inspector and supervisor. For example, an inspector could use the tablet’s camera to take pictures of an asset or specific condition monitoring locations (CMLs) for collaboration or record keeping. Look for these features in an IPM software update in the near future. Industry 4.0 Comes to Maintenance InspectionsThe rapid spread of connected devices and the Internet of Things has already greatly impacted consumer markets, and now it’s beginning to transform industrial inspections. We know there’ll be new challenges to be solved, so we’ve committed to working with our customers to keep adapting the IPM app to their needs. |  |
Related Content
Video: Wireless Transfer of Survey Files Using the IPM App
3 Ways We Uncomplicate Corrosion Thickness Gaging Inspection Data Management
Get In Touch
.jpg?rev=240A)
