Solutions for Metallography
| Solutions for MetallographyTraditionally, metallography is the study of microstructure metals and alloys using optical, digital, and laser scanning microscopes. More recently, as materials have evolved, metallography has expanded to incorporate materials ranging from electronics to composites used in sporting goods. By analyzing a material’s microstructure, its performance and reliability can be better understood. Today metallography is used in materials development, incoming inspection, production and manufacturing control, and failure analysis. Metallography is essential for product reliability. More information is available on the application notes pages |
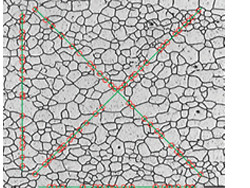
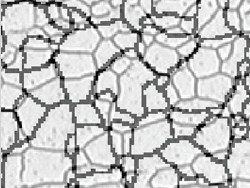
Grain Sizing Using the Intercept Counting MethodThis solution is for manual ferritic or austenitic grain size measurement of steel. It gives a single averaged value using the different available standards ( ASTM E112-13(2021), ISO 643:2020, JIS G 0551:2020, JIS G 0552:1998, GOST 5639-82, GB/T 6394-2017, DIN 50601:1985, and ASTM E1382-97(2015). Key features
|
Grain sizing intercept solution (Microstructure with ferritic grains) |
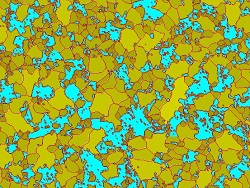
Grain sizing planimetric solution with secondary phase
| Grain Sizing Using the Planimetric MethodThis solution is for automatic grain size distribution measurement on etched microstructures (it also works on aluminum microstructures) using the different available standards ASTM E112-13 (2021), ISO 643:2020, JIS G 0551:2020, JIS G 0552:1998, GOST 5639-82, GB/T 6394-2017, DIN 50601:1985, ASTM E1382-97(2015) Key features
|
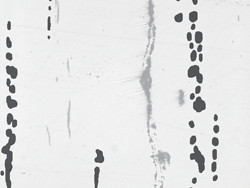
Graphite Nodularity EvaluationThis solution automatically evaluates graphite nodularity and content in cast iron samples (nodular and vermicular types). The form, distribution, and size of graphite nodes are classified according to the ISO 945-1:2018; ASTM A247-17; JIS G 5502:2001; KS D 4302:2006; GB/T 9441-2009; ISO 16112:2017; JIS G 5505:2013; ASTM E2567-16a (for nodularity only) and NF A04-197:2017 standards. This solution also assists with determining the ferrite-pearlite ratio in cast iron cross-sections. Key features
|
Cast iron solution (Ductile Cast iron showing Nodular graphite) |
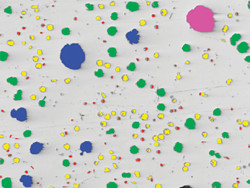
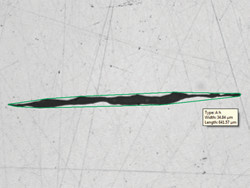
Inclusion worst field solution (Steel with non-metallic inclusions) | Rating Non-Metallic Inclusion Content in certain Steels and AlloysStream Enterprise software offers two methods to detect and classify non-metallic inclusions in certain steels and alloys. One is to detect the largest/worst inclusion, and the other is to run statistical evaluations of all inclusions in the scanned area. The inclusion worst field results are in accordance with ASTM E45-18a (method A), DIN 50602:1985 (method M), ISO 4967:2013 (method A), GB/T 10561-2005 (method A, equivalent to ISO 4967), JIS G 0555:2003 (method A, equivalent to ISO 4967), UNI 3244:1980 (method M), EN 10247:2017 (methods P and M), SEP 1571:2017 (method M). Individual inclusions are displayed and can be edited by the user. The statistical evaluation of inclusion content on the entire scan are examined according to ASTM E45-18 (method D), ISO 4967:2013 (method B), and EN 10247:2017 (method K). Key features
|
Comparing Sample Images with Reference Images
Easily comparing live or captured images with auto-scaled reference images. This solution includes reference images in each available chargeable set ( DIN 50602:1985, ISO 945-1:2019, ISO 643:1983, ISO 643:2012, EN 10247:2017, SEP 1520:1998, SEP 1572:2019, ASTM E112:13(2021), and ISO 4505:1978. The solution also supports multiple modes including live overlay display and side-by-side comparison. Additional reference images can be purchased separately.
Chart comparison solution (Steel with non-metallic inclusions) |
Chart comparison solution (Microstructure with ferritic grains) |
Key features
| Typical applications
| Associated functions
|
Other Recommended Solutions
- Count and Measure
- Particle Distribution
- Porosity
- Extended Phase Analysis
- Weld Measurement
- 3D
