Background
Turbine components are commonly exposed to difficult in-service conditions including high mechanical stress and corrosion attack due to steam or gas. Failure of turbine components can result in catastrophic incidents.
Eddy current array inspection offers the benefits of data recording increased inspection speed and reliability. In addition, newly introduced flexible PCB-based eddy current array probes now fit different shapes. However the edge effect limitation typically remains. Olympus has developed a way to shield a flexible PCB-made eddy current array probe to dramatically reduce the edge effect.
In a turbine component like a dovetail slot or a blade root, one critical zone for cracks is the near the edge of the component. The edge of the part creates a very strong signal that hides the response from a defect located in that zone. This edge effect phenomenon is well known in eddy current testing. Shielded eddy current coils have been used successfully for years to focus the magnetic field and reduce the edge effect dead zone. But there was no way to produce the same results with
flexible PCB eddy current arrays until recently.
Equipment
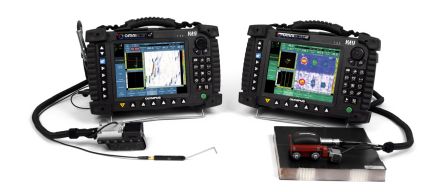
The equipment used for the inspection is comprised of:
- OmniScan ECA
- Shielded flexible PCB-made ECA probe
- 64 elements MUX
- Encoder
- Holder adapted to the application
Picture of the inspection set-up
Details of the flexible PCB eddy current array probe:
- Qty of channel : 64
- Coil type : Absolute, bridge (with reference coils on the probe)
- Total coverage : 76.8mm
- Resolution : 1.2 mm
- Coil design : Rectangular shaped (3mm large x 2.2mm long) with active shielding
- Probe design : 3 rows of coil for optimized coverage

Schematic of the flexible shielded ECA probe
Note that this probe is a special probe not available through our catalogue. Please refer to your Olympus representative to discuss applicability to your project as customisation is necessary.
Typical procedure
A setup was established that highlighed the advantages of that probe. A sample representing a turbine blade root was machined with EDM notches (0.8 mm x 0.4 mm), with one is located 1mm from the edge and the others at different positions of the cross-section as shown below (Figure 1).
A customized probe holder conforming to the geometry of the sample was quickly built with a rapid prototype machine (Figure 2). Then the probe (Figure 3) was attached to the holder and an encoder was attached to the assembly (Figure 4). The part can now be scanned in one pass with the ECA probe (Figure 5).
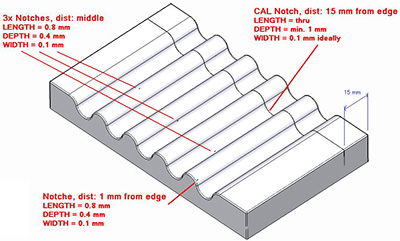
Figure 1: Drawing of a turbine component mock-up
Figure 2: Holder manufactured with rapid prototype machine
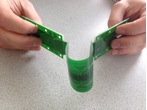
Figure 3: flexible PCB-made eddy current array probe

Figure 4: Assembly
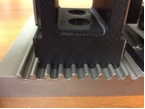
Figure 5: Inspection of the component in one pass
Results
The results of the test are displayed as C-scan representations. The notch located at the edge (on the left) is clearly detected and separated from the edge effect signal. It shows that the dead zone due to the edge is smaller than 1 mm. Also, the other notches located far from the edge are detected. It should be noted that the amplitude of detection is similar. Therefore, this probe detects similar defects with the same amplitude rather they are close or far from the edge.
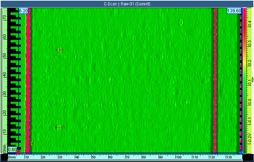
Cscan representation of the turbine components
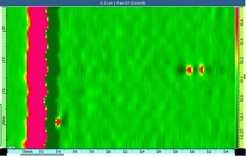
Zoom around notch located at the edge
Conclusion
The use of flexible shielded PCB-based eddy current array probe permits inspection of different complex shapes. This probe reduces the edge effect allowing clear detection of notch near the edge. Also, this probe assures reliable detection of notches over the whole surface of the turbine component.


