Background
The surface of a weld has to be inspected for surface imperfections during pre-service and in-service examinations as a complement to full volumetric inspection with ultrasound or X-rays. The purpose of this surface inspection is to detect flaws that are open to the surface. Correlated with an ultrasonic inspection, this would help to characterise dangerous flaws as surface-breaking cracks.
Surface inspection techniques including fluorescent penetrant inspection (FPI), magnetic particle inspection (MPI), and eddy current testing have been used for many years but these techniques do not allow the inspector to record and archive the data. The use of traditional eddy current probes on a weld is difficult because of the roughness and geometry of the weld. Additionally, the uneven surface typically seen in the as-welded condition has been a main concern for the use of eddy current
arrays, but the recent development of a flexible eddy current probe has overcome that limitation.
The use of a flexible eddy current array allows reduction of noise due to lift-off because the probe conforms better to the shape of the weld. In addition, the use of an ECA probe with the OmniScan ECA allows the inspector to record and archive the data, which complies with most
inspection codes while FPI and MPI techniques can't. This application note reviews results obtained during the inspection of a representative SS316 weld.
Equipment
The equipment used for the inspection is comprised of:
- Instrumentation: OmniScan MX with ECA module
- Probe: FBB-051-500-032
- Encoder: ENC1-2.5-DE for manual inspection
- CHAIN Scanner
- Probe holder for semi-automated inspection
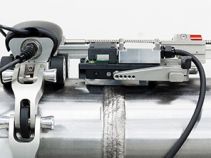
Inspection set-up with the flexible ECA probe and the CHAIN scanner
Note that some elements of this setup are not available through our catalog. Please refer to your Olympus representative to discuss applicability to your project as customisation is necessary.
Typical procedure
The FBB-051-500-032 probe used for this application has the following specifications:
- 32 coils
- 30 channels
- 3.1mm of coil diameter
- Coil type: Reflexion (transmit-receive) with each channel being build using an exciter coil and two receiver coils connected in series.
- Total coverage: 48mm
- Resolution: 1.6 mm
- Probe design: 2 rows of staggered coils
- Frequency range: 100KHz to 4000KHz
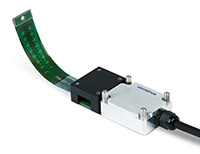

Flexible eddy current array probe (on the right, zoom on the staggered coils)
The probe is used with a cable that connects the coils in a transmit-receive configuration in which one coil is an exciter and 2 coils are receivers as shown below:

Transmit-receive configuration
The flexible eddy current array probe can be mounted on a CHAIN scanner or used with a manual encoder. The weld and the adjacent zones are inspected in only one pass. The results are displayed in the OmniScan ECA.
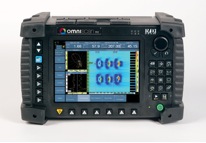
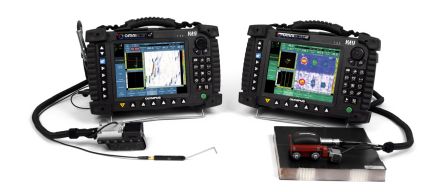
The OmniScan ECA
Results
An as-welded SS316 sample with 4 EDM reference notches 6 mm long by 1 mm deep was examined. Notches are located in the four different areas: on the weld crown (1), at the weld toe (2), on the heat-affected-zone (3) and on the parent metal (4) as shown in the picture below.
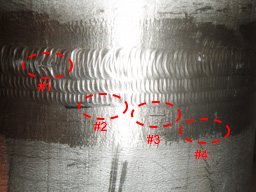
Picture of the stainless steel weld sample
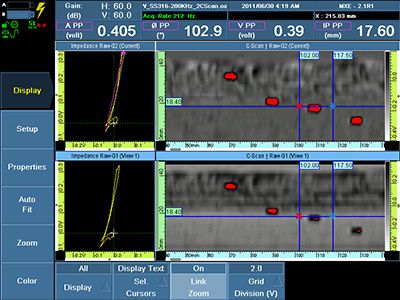
The results of the test are displayed as C-scan representations. On the upper C-scan, all the notches are clearly detected regardless of their position around the weld. The length of the indication can be measured with the cursors. The lower C-scan clearly shows the weld zone and it is a guarantee the weld is properly inspected.
C-scan representations on the OmniScan ECA
Conclusion
The flexible eddy current array probe and the OmniScan ECA can successfully be used to inspect the surface of stainless steel welds. This probe detects notches located at different positions around the weld in only one pass.
Note that stainless steel welds are easier to inspect with eddy current than carbon steel because they are non-magnetic. Therefore, the results described in this application note cannot be transferred to carbon steel welds.
