Pipelines transport energy (crude oil, refined petroleum, natural gas, and biofuels to name a few) and other fluids within facilities and to various markets across vast distances. Today, there are millions of miles of pipeline all over the world, and many of these systems are old. The integrity of the pipelines is of paramount concern to ensure the safety of people and the environment.
Pipes can corrode internally, resulting in a loss of wall thickness. If the wall becomes too thin, the pipe can leak or even break. A pipe’s wall thickness can degrade for many reasons, including temperature, carbon dioxide (CO2) and hydrogen sulfide (H2S) content, flow velocity, and surface conditions. Sometimes this corrosion is expected based on what a pipe is made of and what it’s carrying, and sometimes the corrosion is unexpected.
Replacing all the older pipelines in the world is cost prohibitive. Fortunately, a rigorous pipeline inspection program using nondestructive testing makes it possible to accurately assess a pipe’s condition to validate expected rates of corrosion or detect unexpected corrosion so that it can be corrected. With this information, operators can conduct localized repairs and pipe replacements, enabling them to control costs and maintain high safety standards.
How we help inspectors monitor for corrosion
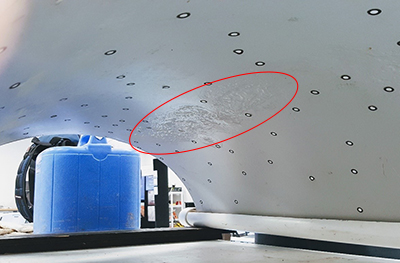
Many times, an inspector only has access to the outside surface of a pipe, leaving him or her blind to the inside conditions. Nondestructive testing using DC1 or DC2 conventional corrosion transducers helps inspectors to measure the remaining wall thickness of pipes so they can more accurately determine a pipe’s condition. Conventional ultrasound works by sending high-frequency sound waves into the pipe through a transducer. The sound waves travel through the pipe and are reflected back to the transducer. A flaw detector reads these signals and provides a visual output, called an A-scan. For this application, we used a transducer with two independently |  The area in red illustrates the presence of corrosion and the thinning effect that it has on pipe wall thickness. |
The DC1 and DC2 7.5 MHz, 0.375 in. diameter dual conventional transducers are small, so they can be easily gripped with the fingertips, enabling them to be used in areas that are hard to access. They work well on pipes with a diameter as small as 1 inch. The probes are connected to a flaw detector, such as the EPOCH® 6LT or EPOCH 650 instruments. This combination enables users to accurately identify and assess corrosion zones.
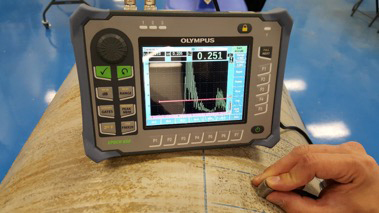
Using the DC1 (standard housing) or DC2 (thick-wall, wear-resistant housing) in a light “scrubbing” action, the inspector can identify areas consistent to nominal pipe thickness prior to degradation as well as detect a corrosion zone and accurately measure correlative metal loss within that zone.
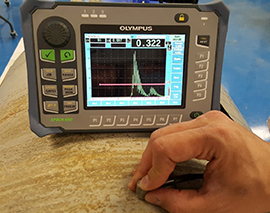
 No evidence of corrosion: the nominal wall thickness of this pipe is 0.325 in. |  Evidence of corrosion: the flaw detector is showing the minimal remaining wall thickness in this area is only 0.251 in. |
Conclusion
It’s vital that every pipeline integrity management system include inspection for and monitoring of corrosion to help ensure the safe transport of various fluids around the globe. The accurate detection of pipeline corrosion enables these areas to be repaired promptly before the corrosion can lead to a more serious problem. This, in turn, helps protect the health and safety of people and the environment worldwide.
Related Content
An Introduction to Ultrasonic Transducers for Nondestructive Testing
Small-Diameter Pipes and How to Inspect Them
How the Echo-to-Echo and THRU-COAT Techniques Measure Up for Corrosion Inspection

