9.1 端点衍射
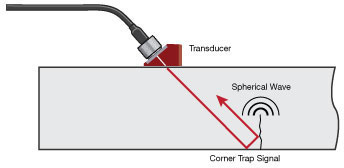
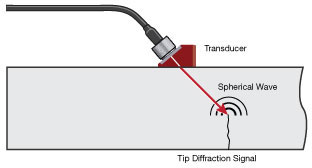
Wave diffraction is a general phenomenon in ultrasonics. The sharp tip of a well defined internal defect like a crack will diffract an incident ultrasonic beam, creating a spherical wave front whose arrival at the probe can be used to locate the tip and measure the depth of the crack. Common angle beam transducers are used for this test. Higher transducer frequencies produce the strongest diffraction signals.
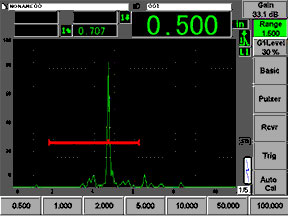
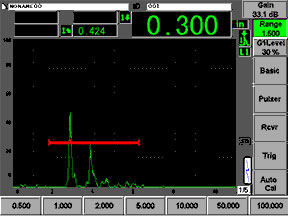
In the example below, a 5 MHz transducer with a 45 degree wedge is used to measure the depth of a 0.2” (5 mm) tall crack on the bottom of a 0.5” (12.5 mm) thick steel plate. The waveform at left shows the peaked-up indication from the bottom corner of the crack. The probe is then moved to the right per the drawings and the tip diffraction signal appears ahead of the corner indication. When the tip signal has been peaked, a trigonometric calculation based on the sound path length provides the distance to the top of the crack.
 |  |
 |  |
corner indication
|
tip diffraction and corner indications
|
A related weld inspection technique is Time of Flight Diffraction (TOFD), which typically employs pairs of specialized longitudinal wave wedges with highly damped broadband transducers, mounted on opposite sides of the test zone in a pitch/catch arrangement. Transducer element size, frequency and separation are selected so as to flood the weld area with sound. Tip diffracted signals are visualized in a cross sectional B-Scan image. Since the TOFD technique involves scanning with specialized fixtures and imaging software, it is outside the scope of this tutorial.