超声测厚 - 腐蚀
Corrosion survey

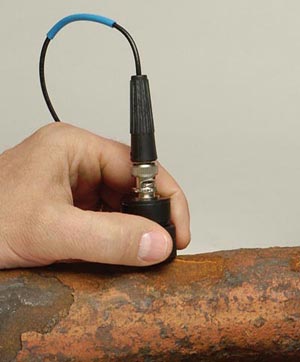
Just about anything made of common structural metals is subject to corrosion. An important challenge in many industries is measuring remaining wall thickness in pipes, tubes, or tanks that may be corroded on the inside surface. This corrosion is often undetectable by visual inspection without cutting or disassembling the pipe or tank. Ultrasonic testing is a widely accepted nondestructive method to perform this inspection, and ultrasonic testing of corroded metal is usually done with dual element transducers and dedicated corrosion gauges.
Why Is It Important to Inspect Metals for Corrosion?
Structural steel beams, particularly bridge supports and steel pilings, are also subject to corrosion that reduces the original thickness of the metal. If undetected over time, corrosion will weaken walls and can cause dangerous structural failures. Both safety and economic considerations require that metal pipes, tanks, or structures that are susceptible to corrosion are inspected regularly. Ultrasonic thickness gauges enable you to accurately detect potential internal corrosion without damaging the metal and while accessing one side of the surface.
How Do Ultrasonic Thickness Gauges Detect Corrosion?
All gauges designed for corrosion applications will measure the round-trip transit time interval to the first back wall echo. Advanced instruments can also measure the interval between successive multiple echoes. They use signal processing techniques that are optimized for detecting the minimum remaining thickness in a rough, corroded test piece. This allows these gauges to calculate the specific thickness of corrosion, without being affected by the metal or its coating.
The irregular surfaces that are frequently encountered in corrosion applications give dual element transducers an advantage over single element transducers. Dual element transducers incorporate separate transmitting and receiving elements, mounted on delay lines that are usually cut at an angle to the horizontal plane (the roof angle), so that the transmitting and receiving beam paths cross beneath the surface of the test piece. This crossed-beam design of duals provides a pseudo-focusing effect that optimizes the measurement of minimum wall thickness in corrosion applications.
Duals will be more sensitive than single element transducers to echoes from the base of pits that represent the minimum remaining wall thickness. Also, duals are often more effective on rough outside surfaces. Couplant trapped in pockets on rough sound entry surfaces can produce long, ringing surface echoes that interfere with the thin material resolution of single element transducers. With a dual, the receiver element is unlikely to pick up this false echo. Finally, most duals can make high-temperature measurements that would damage single element contact transducers.
Olympus has ultrasonic thickness gauges designed to perform detailed, accurate corrosion inspections. To learn more about how ultrasonic thickness gauges detect corrosion in metals, see our guide on how thickness gauges work.