Formation of Oxide Scale in Boiler Tubes
The very high temperatures found inside steam boilers (in excess of 800 °C or 1472 °F) can cause the formation of a specific type of hard, brittle iron oxide called magnetite on the inside and outside surfaces of steel boiler tubing. At very high temperatures, water vapor will react with the iron in the steel to form magnetite and hydrogen according to the following formula:
3 Fe + 4 H 20 = Fe 3O 4 + 4 H 2
The speed of this reaction increases with temperature. Oxygen atoms will diffuse inward through the magnetite layer, and iron atoms will diffuse outward, so the scale continues to grow even after the tube surface is completely covered.
Magnetite scale acts as thermal insulation on the pipe since the thermal conductivity of scale is only about 5% that of steel. When heat can no longer transfer efficiently from the flame through the tube into the steam inside, the tube wall will heat up to temperatures beyond the intended operating range.
Long-term exposure to overly high temperatures, combined with the very high pressure inside the tube, leads to intergranular micro-cracking in the metal and to creep deformation (a slow swelling or bulging of the metal), which eventually leads to tube failure by bursting. A secondary issue is oxide exfoliation, in which pieces of oxide scale break off (usually due to thermal stresses during boiler startup or shutdown). These hard pieces will be carried by the steam flow into the turbine, where they will cause erosion damage over time.
The growth of magnetite scale and the associated metal damage are primary limiting factors with respect to boiler tube service life. The process begins slowly and then accelerates. As the scale grows thicker, the tube wall becomes hotter. The heat increases the rate of scale growth and metal damage. Studies in the power generation industry have indicated that the effect of scale is relatively insignificant up to thicknesses of approximately 0.3 mm (0.012 in.). Beyond that, thickness the
negative effects of scale increase rapidly.
Ultrasonic Measurement of Scale Thickness in Boiler Tubes
Periodic measurement of scale thickness enables a plant operator to estimate remaining tube service life and to identify and replace tubes that are approaching the failure point. Ultrasonic testing provides a quick and nondestructive method for measuring scale.
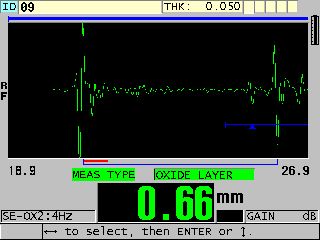
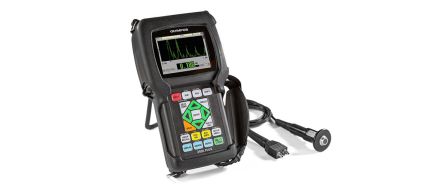
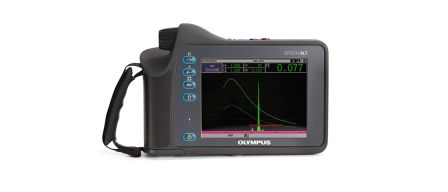
Portable ultrasonic instruments, such as the 39DL PLUS™ thickness gauge or the EPOCH™ series flaw detectors, can measure internal oxide layers down to a minimum thickness of approximately 0.2 mm or 0.008 in. using the commonly recommended M2017 transducer (20 MHz delay line). The specialized M2091 transducer, which is a 20 MHz shear wave probe, can be used along with shear wave couplant to measure
down to approximately 0.152 mm or 0.006 in. In all cases, the coupling surface must be smooth. In some cases, surface preparation is required.
Typical internal oxide measurement with a thickness gauge and M2017 delay line transducer (zoomed)
Typical internal oxide measurement with a flaw detector and an M2017 delay line transducer, showing the delay line echo on the left of the screen
Further detailed information about oxide scale and its effects on boiler tubing may be found in the book, Metallurgical Failures in Fossil Fired Boilers by David N. French (John Wiley Sons, 1983).


