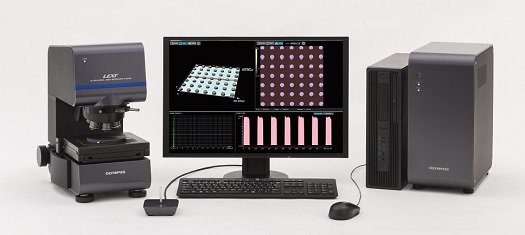
Olympus Corporation (President: Hiroyuki Sasa) is pleased to announce the simultaneous worldwide launch of the LEXT OLS5000 3D measuring laser microscope on October 18, 2017, as a new product from its Scientific Solutions business. The OLS5000 microscope is used in research and development and quality inspection in the automotive, electronic component and semiconductor industries.
The OLS5000 3D measuring laser microscope scans laser light over the surface of a sample to provide enlarged images of micro-scale features and to perform shape measurements of surface roughness, steps, and other features.
The new LEXT OLS5000 microscope is the successor to the OLS4100 microscope and offers significantly improved measurement performance. New 4K scanning technology and enhanced optics designed specifically for the LEXT OLS5000 microscope enable the detection of near-perpendicular features and small steps at close to the nanometer scale. The microscope comes with intuitive software designed for usability with features including the ability to automate settings that previously had to be specified by the operator. Large samples or samples with an uneven surface can be measured thanks to the addition of an expansion frame that can accommodate samples up to 210 mm tall and a long working distance objective lens* designed specifically for the OLS5000 microscope. This provides support for sophisticated user requirements from performing observations through data acquisition, analysis and reporting.
* A lens that can work at a greater distance from the sample surface than a conventional lens.
•Launch Overview
| Name | Launch Date |
| LEXT OLS5000 3D Measuring Laser Microscope | October 18, 2017 |
•Main Features
- Enhanced measurement reliability thanks to 4K scanning technology and optics designed specifically for the OLS5000 microscope
- Data acquisition that is four times faster than the previous model and intuitive software
- Accommodates samples up to 210 mm tall and concavities up to 25 mm deep using an expansion frame and long working distance objective lens
•Launch Background
With the advance of nanotechnology and the sophistication and miniaturization of electronic devices and car parts, accurately measuring the surface features of product components is an increasingly important part of quality management. In the past, stylus-based roughness instruments that measured shape by direct contact with the sample were widely used to measure roughness and surface shape. However, because an increasing number of samples are difficult to measure using stylus-based instruments, including fragile samples, such as films, or samples with height variations that are less than the diameter of the stylus, more precise nondestructive, noncontact surface measurement techniques are required. To meet this demand, Olympus developed the LEXT OLS5000 3D measuring laser microscope to perform accurate three-dimensional measurement of the surface shape of a wide variety of samples using a technique that is noncontact and open to the atmosphere.
•Details of Main Features
1. Enhanced measurement reliability through 4K scanning technology and optics designed specifically for the LEXT OLS5000 microscope
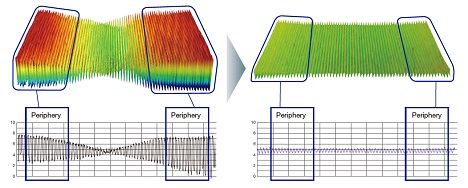
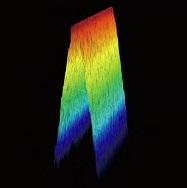
A new 10X lens optimized for a 405 nm wavelength light source and a long working distance objective lens were developed specifically for use with the LEXT OLS5000 microscope. These optics reduce aberration to a minimum, enabling accurate measurements across the entire field of view. The adoption of 4K scanning technology with a resolution of 4,096 pixels in the X direction (four times that of the previous model) enhances the resolution and improves the reliability of shape measurements (a two-fold improvement in the signal-to-noise ratio), enabling the detection of near-vertical slopes and small steps without image correction.
|
|
Previous lenses (left) and LEXT objective lenses (right) | A sample with steep angles (razor blade) |
2. Data acquisition that is four times faster than the previous model and intuitive software
The OLS5000 microscope uses the PEAK algorithm for fast and precise measurements at both low and high magnification, with a data acquisition speed four times faster than the previous model. Meanwhile, the Smart Scan II and analysis templates functions automate the workflow from data acquisition to reporting, making it easy for anyone to operate the microscope simply by pushing the start button. These features make the microscope easy to use, even for novice operators.
3. Accommodates samples up to 210 mm tall and concavities up to 25 mm deep using an expansion frame and long working distance objective lens
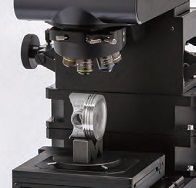
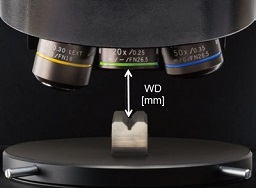
The expansion frame version of the OLS5000 microscope can accommodate samples up to 210 mm in height. Users can simply insert or remove height adjustment blocks or other accessories in the expansion frame to make adjustments as needed. Similarly, observation and measurement can be performed on samples with a concavity by using a long working distance lens, which enables a separation between the lens and sample of up to 25 mm.
|
|
Expansion frame | Long working distance objective lens |
The company names and product names specified in this release are the trademarks or registered trademarks of each company.
Media Contact
Hilary Banda
+1.781.419.3624
Hilary.Banda@olympus-ossa.com
